Transfer Shopify prices to eSagu via n8n: Set up the Shopify app and eSagu token
This guide explains how to connect Shopify, n8n, and eSagu. You will create a Shopify app with the required read permissions, store its credentials in n8n, and create an eSagu API token. n8n can then retrieve product data from Shopify and send it to the eSagu API.
1. Create a Shopify app
-
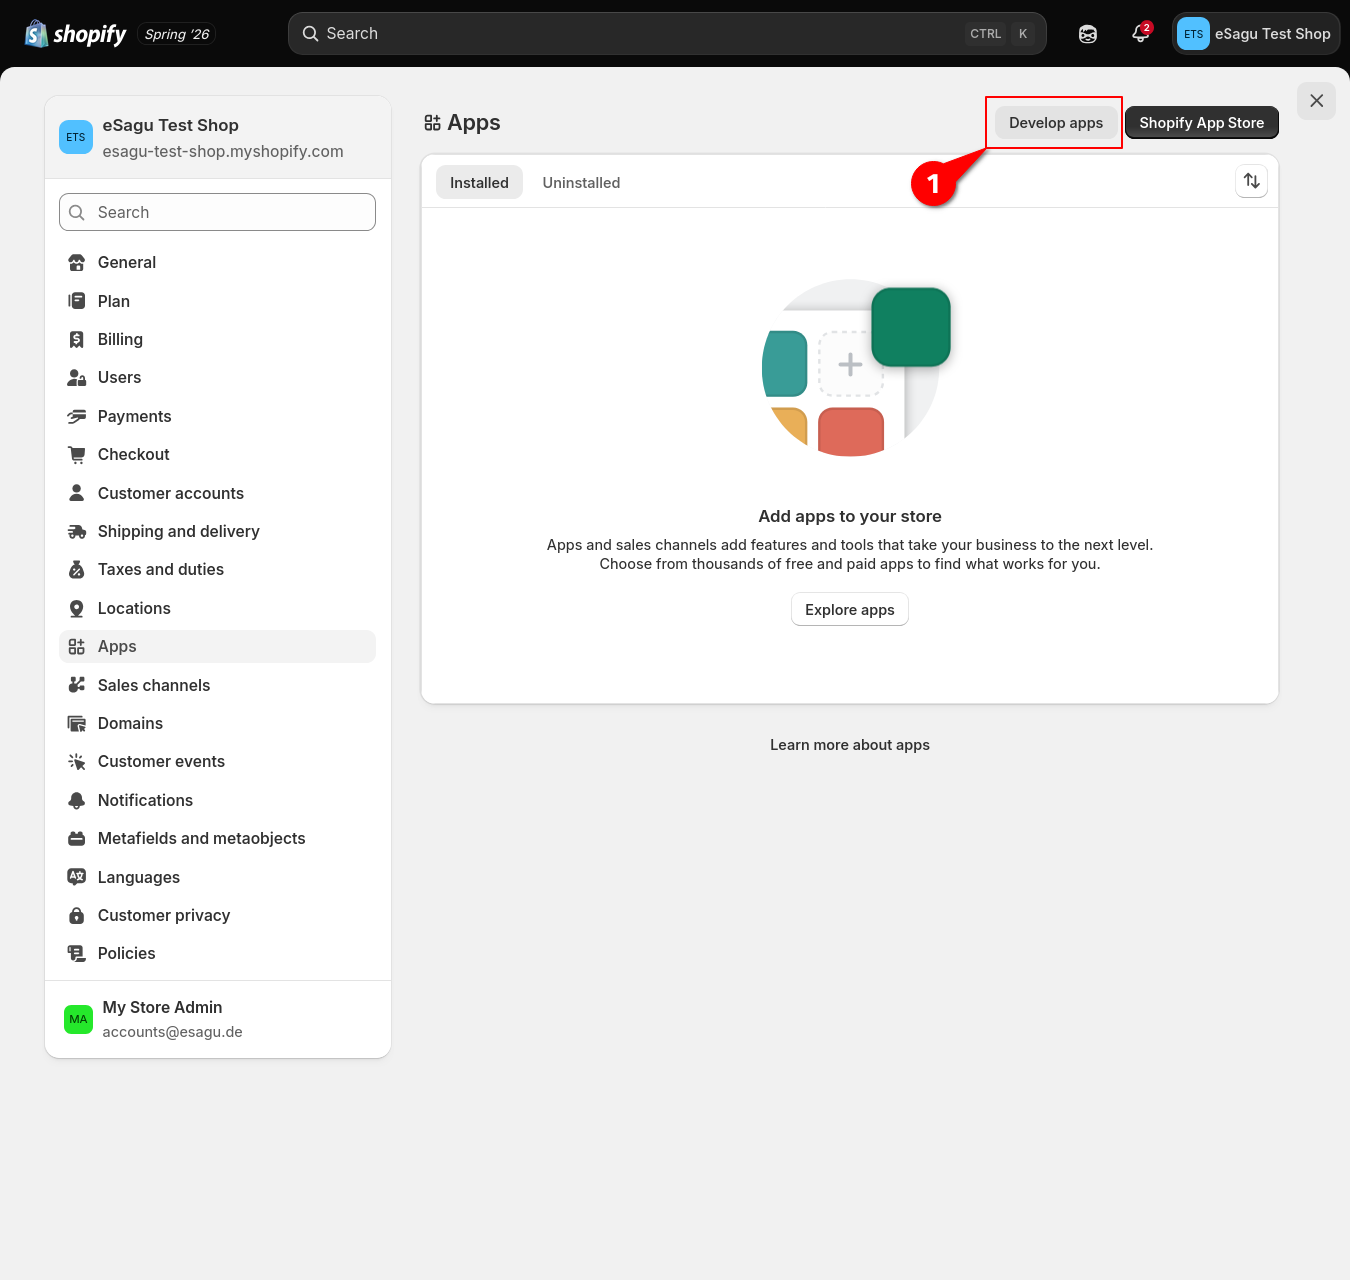
In Shopify, click Settings in the bottom-left corner.

-
Open Apps and select Develop apps.
-
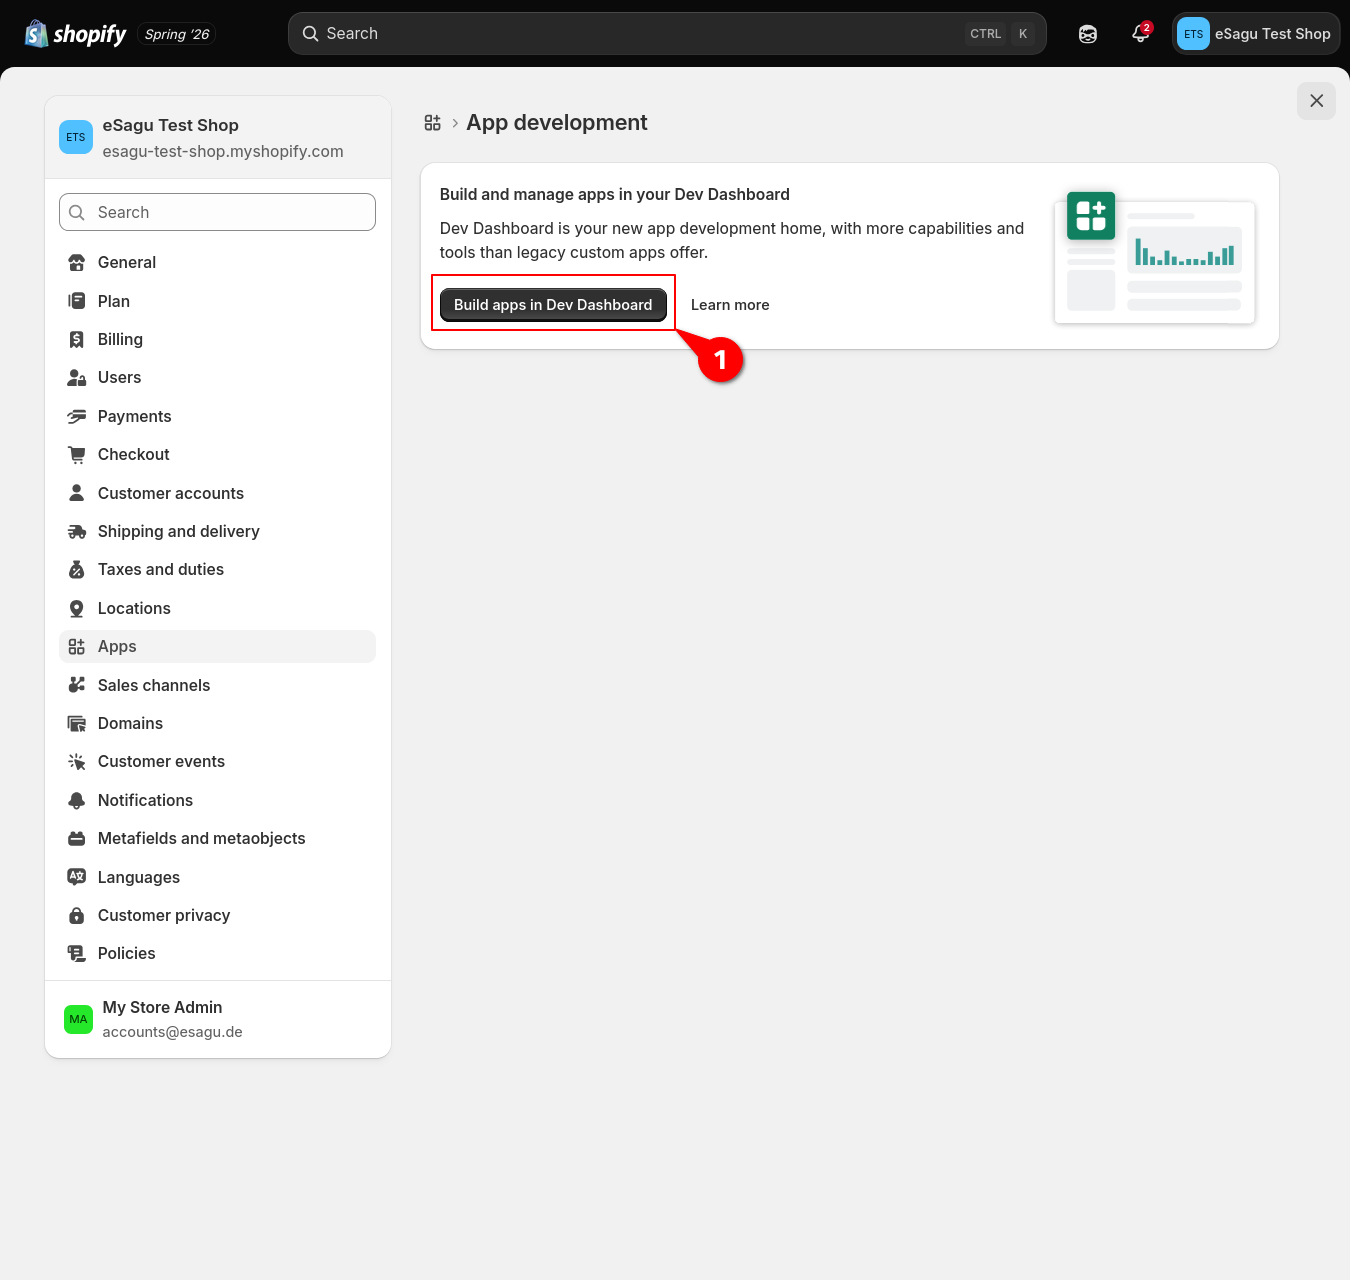
Click Build apps in Dev Dashboard.
-
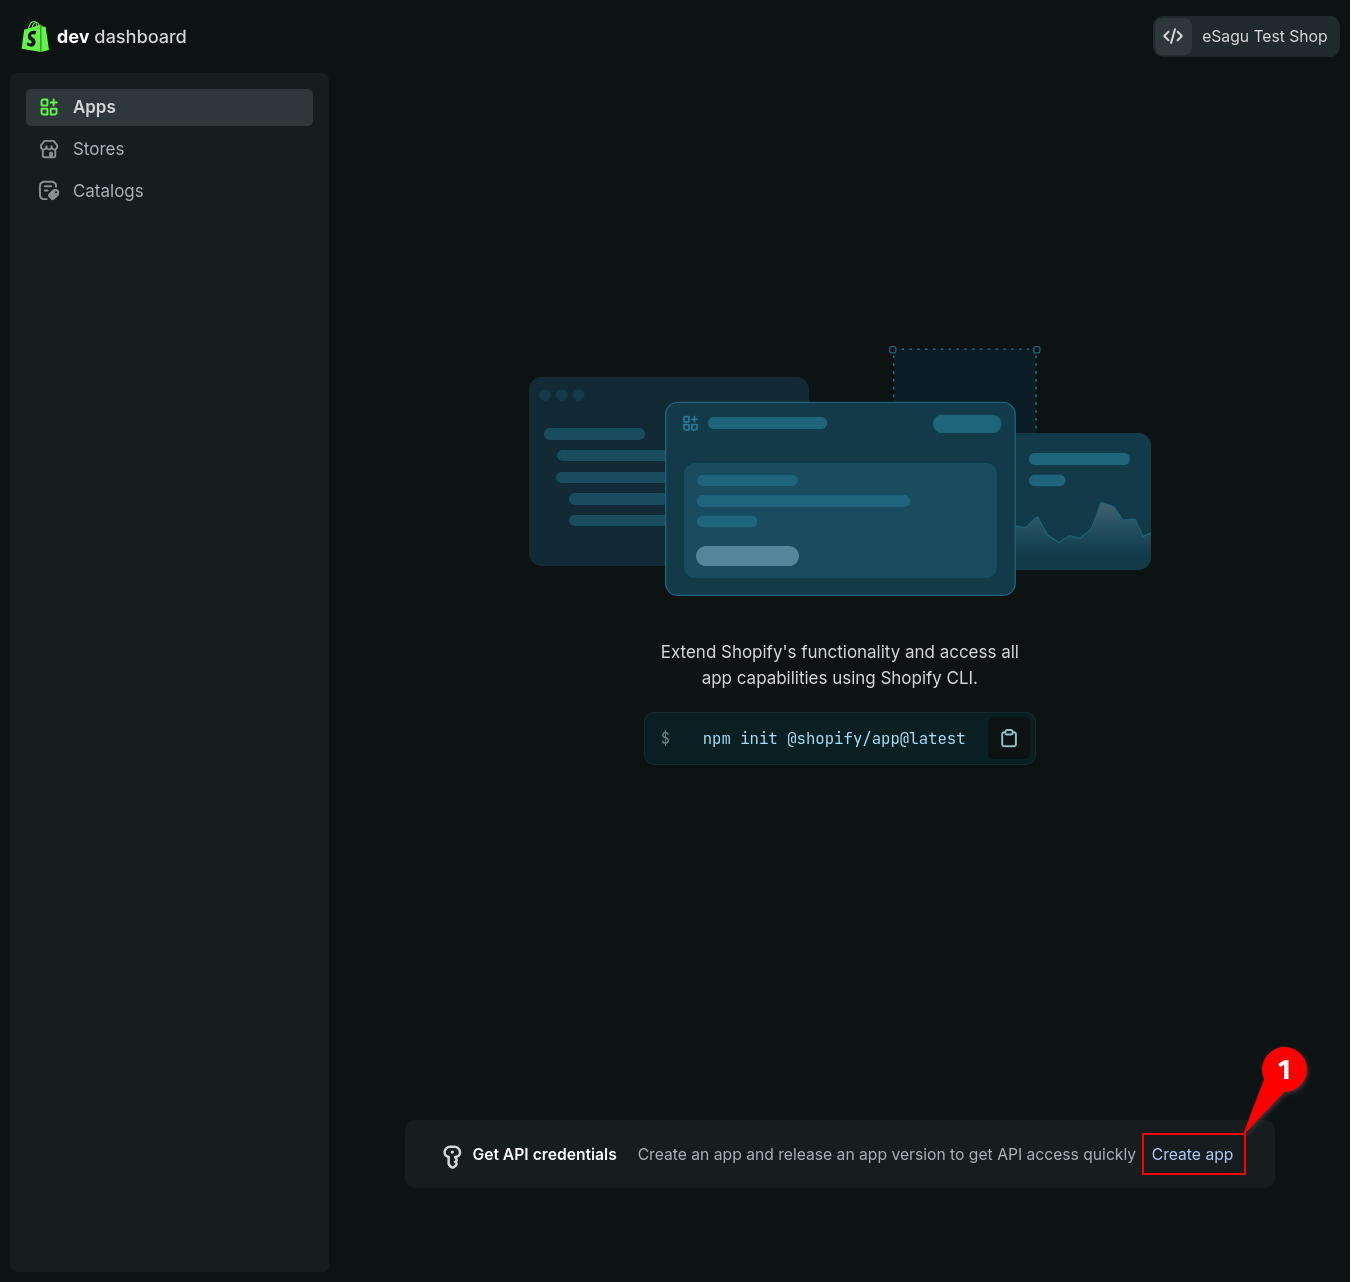
In the Dev Dashboard, click Create app.
-
Enter a name, such as
eSaguConnector, and select Create.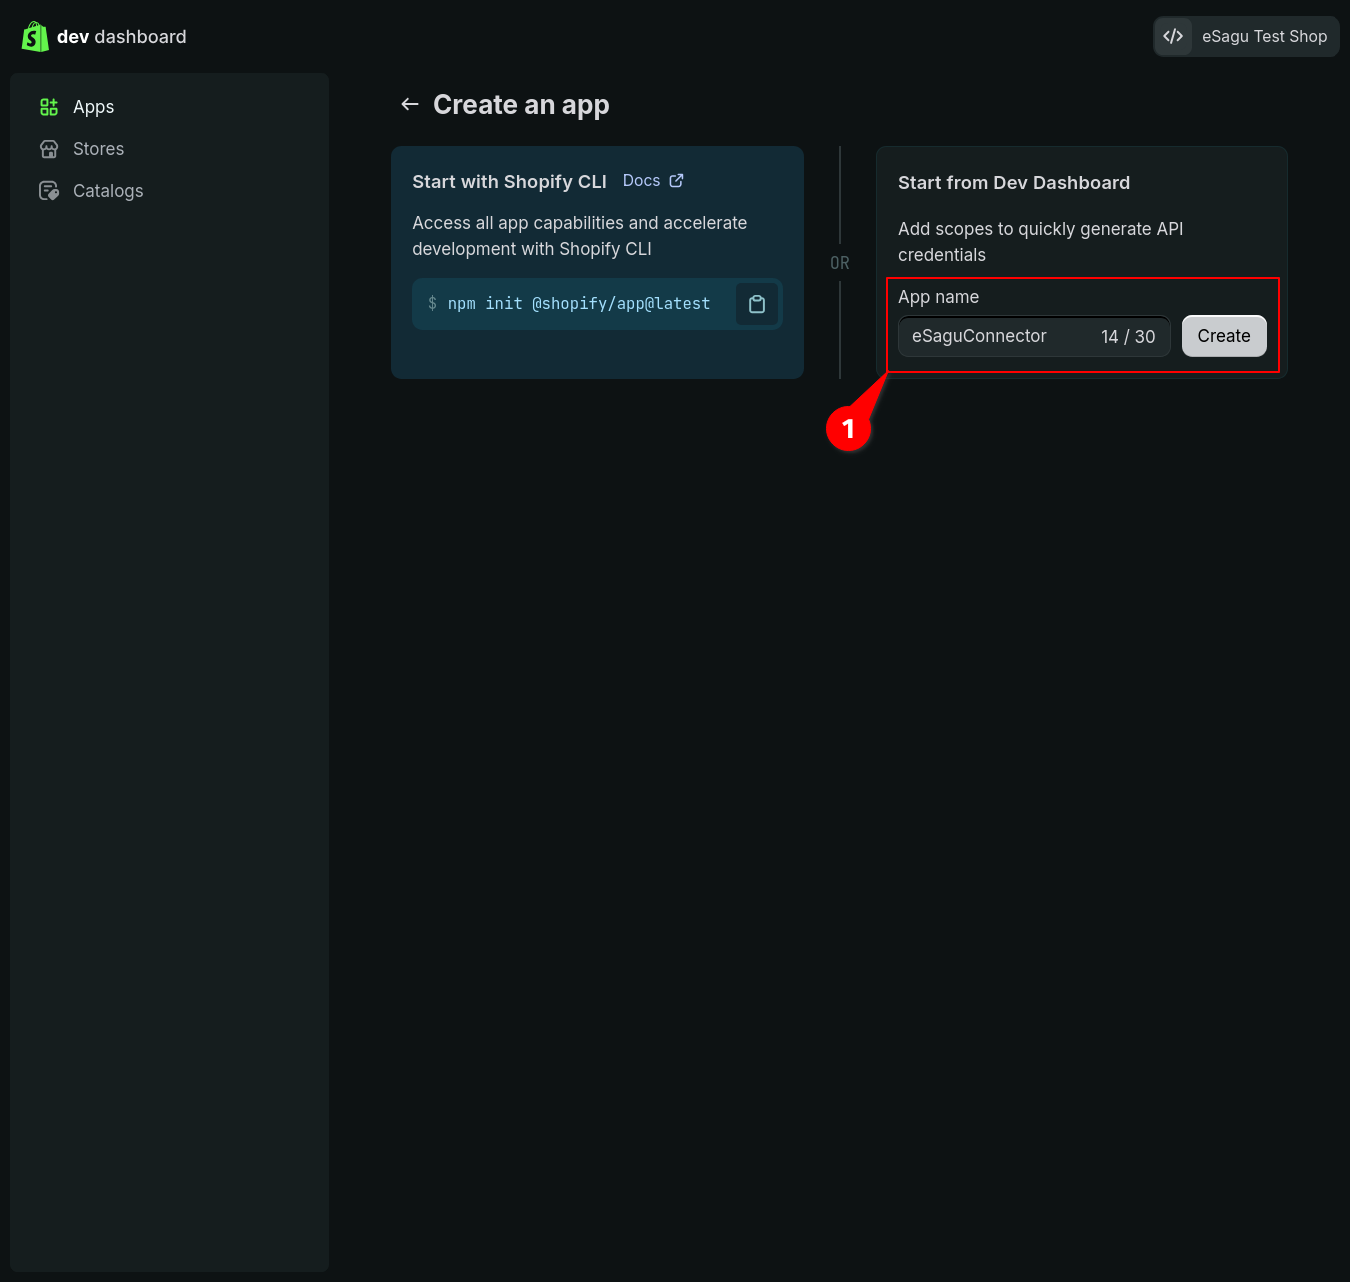
2. Configure permissions
-
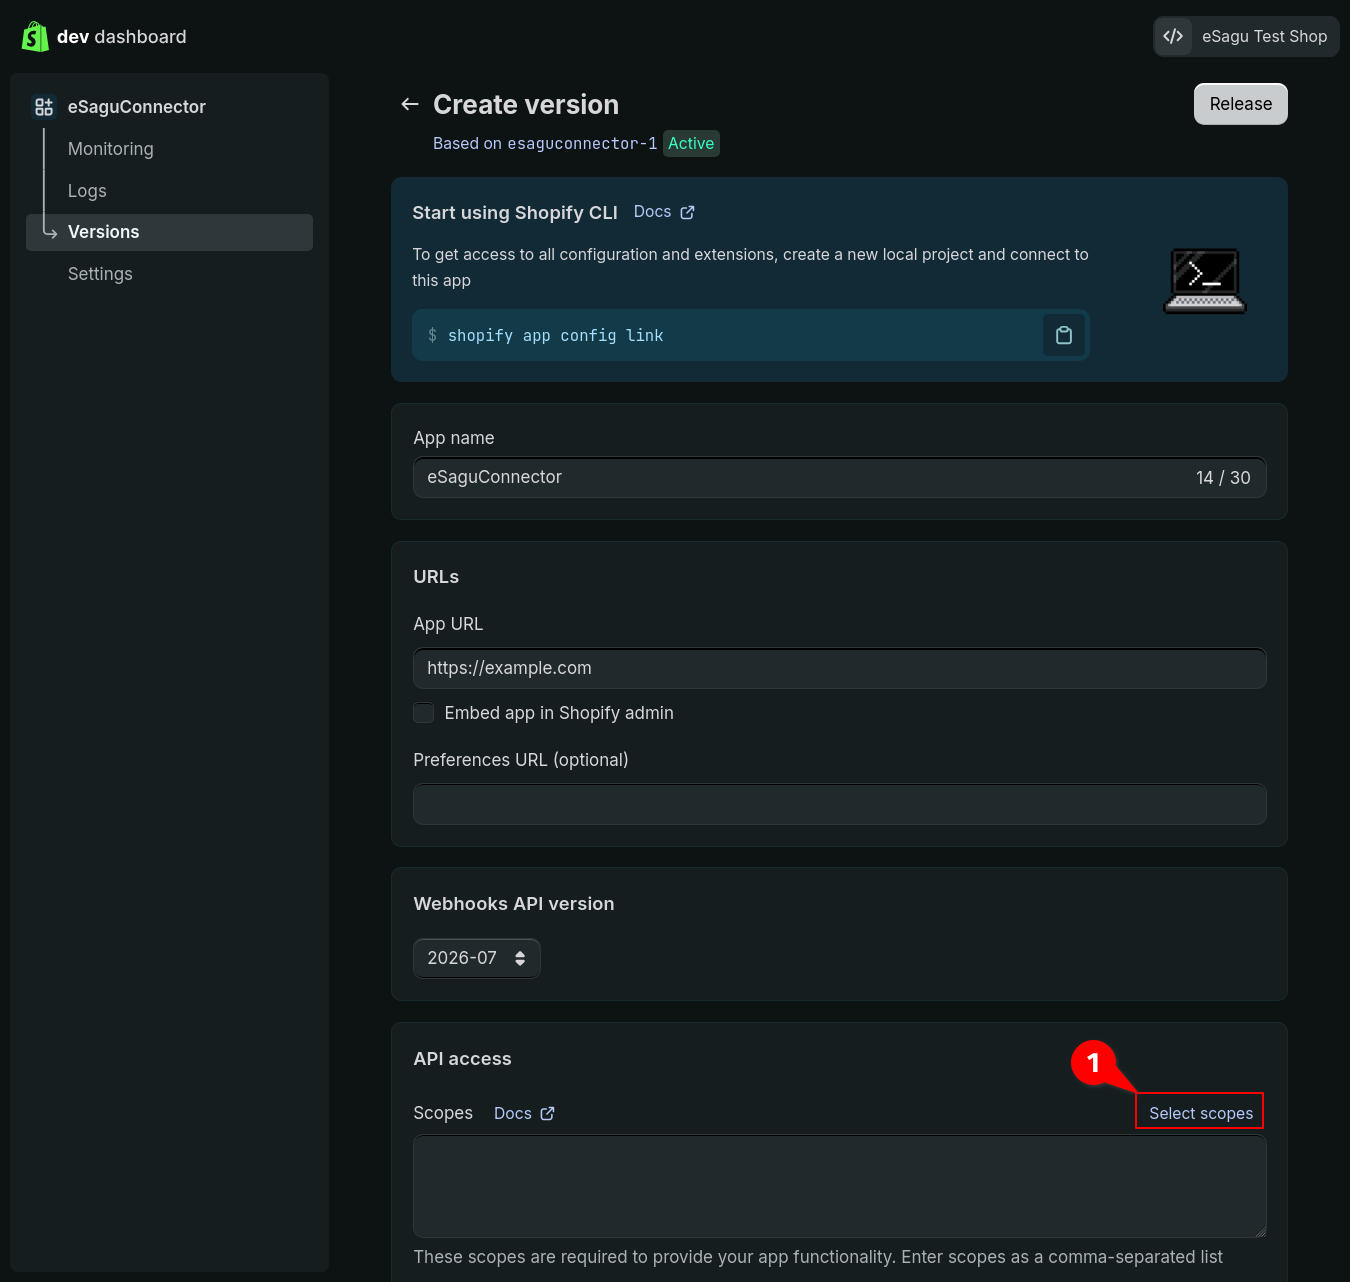
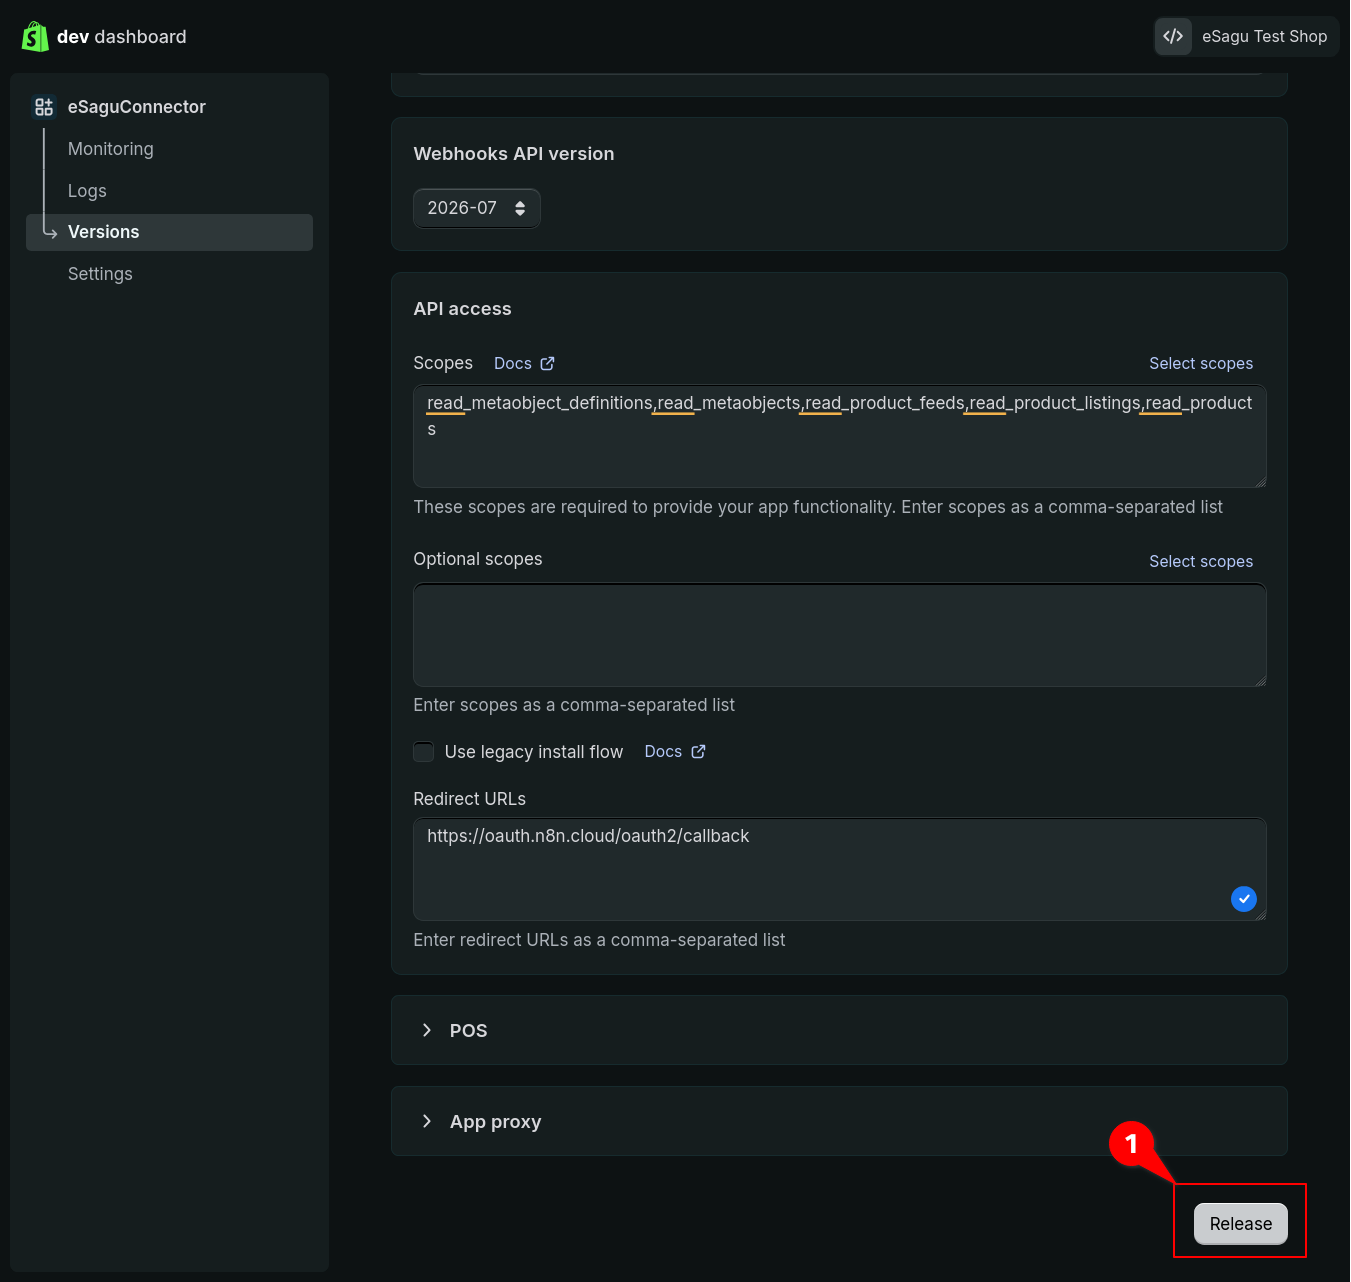
Under Versions, create a new version. Under API access, click Select scopes.
-
Use the search function to select the following read permissions:
-
read_product_feeds -
read_product_listings -
read_products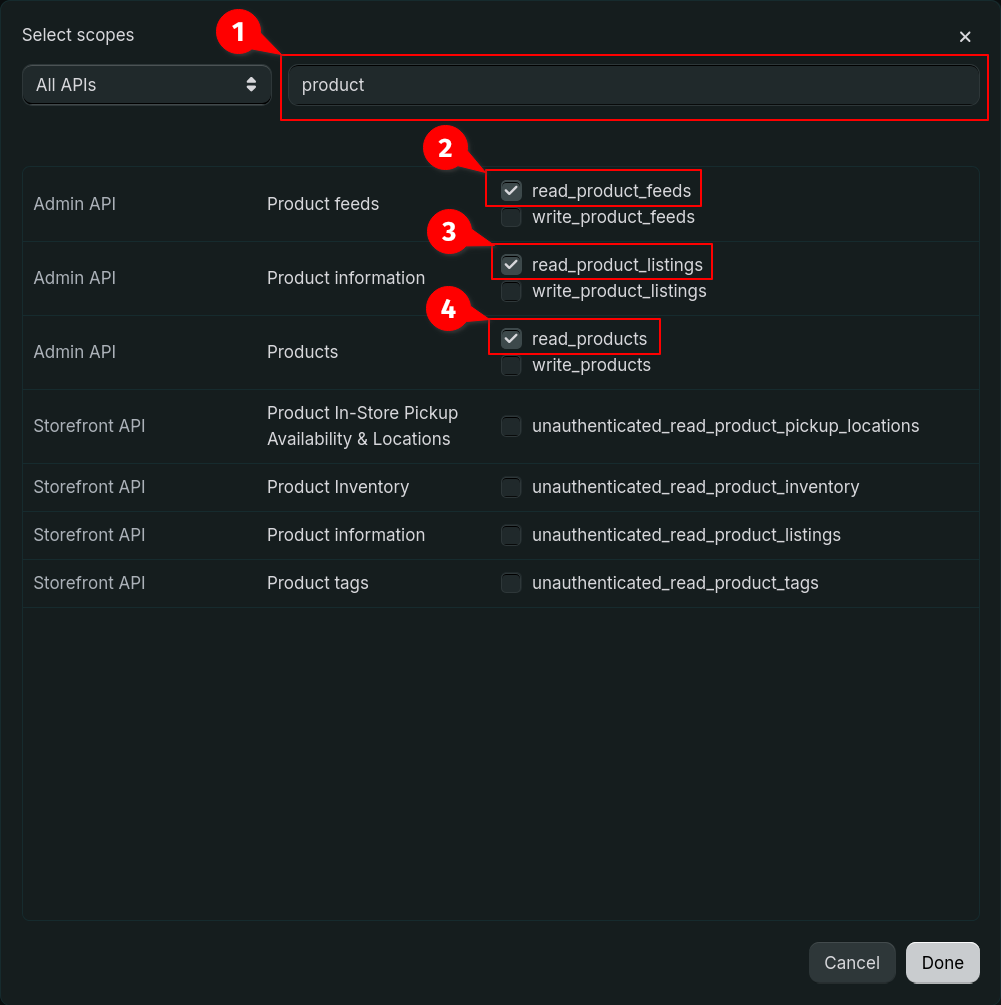
-
read_metaobject_definitions -
read_metaobjects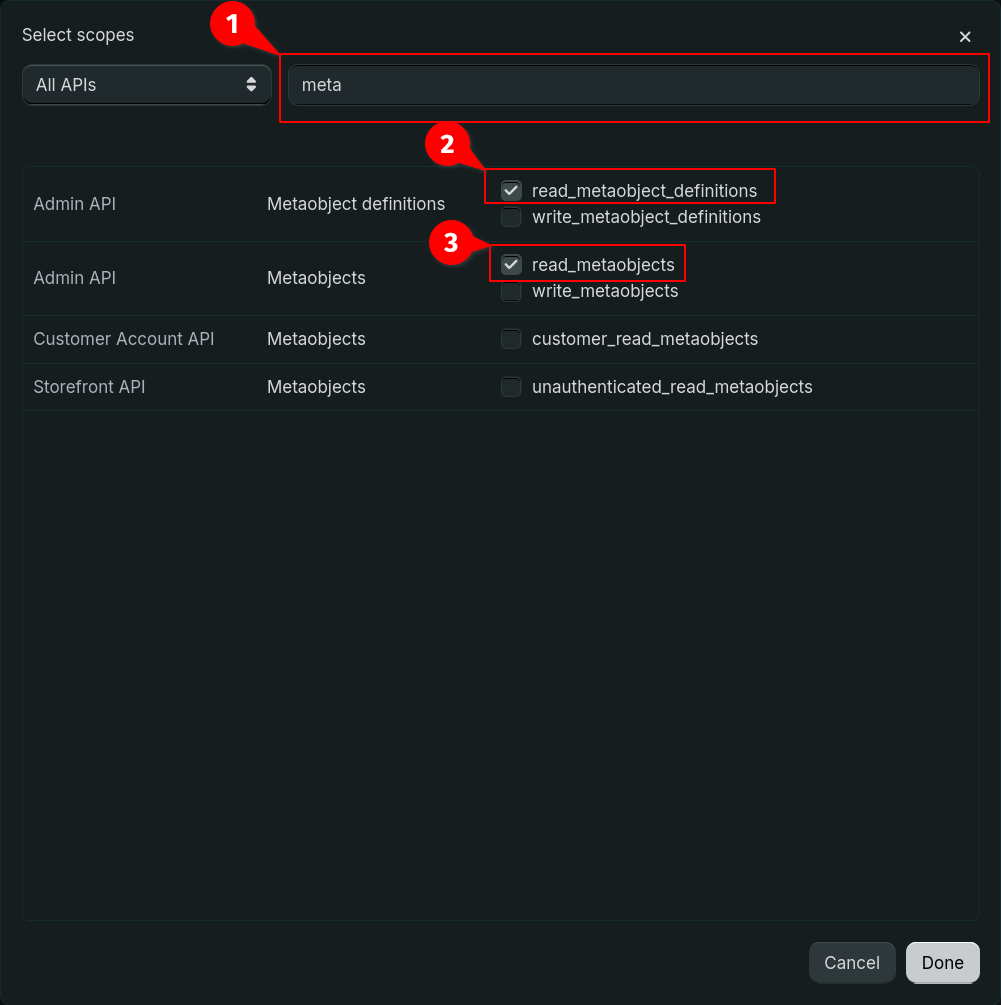
-
-
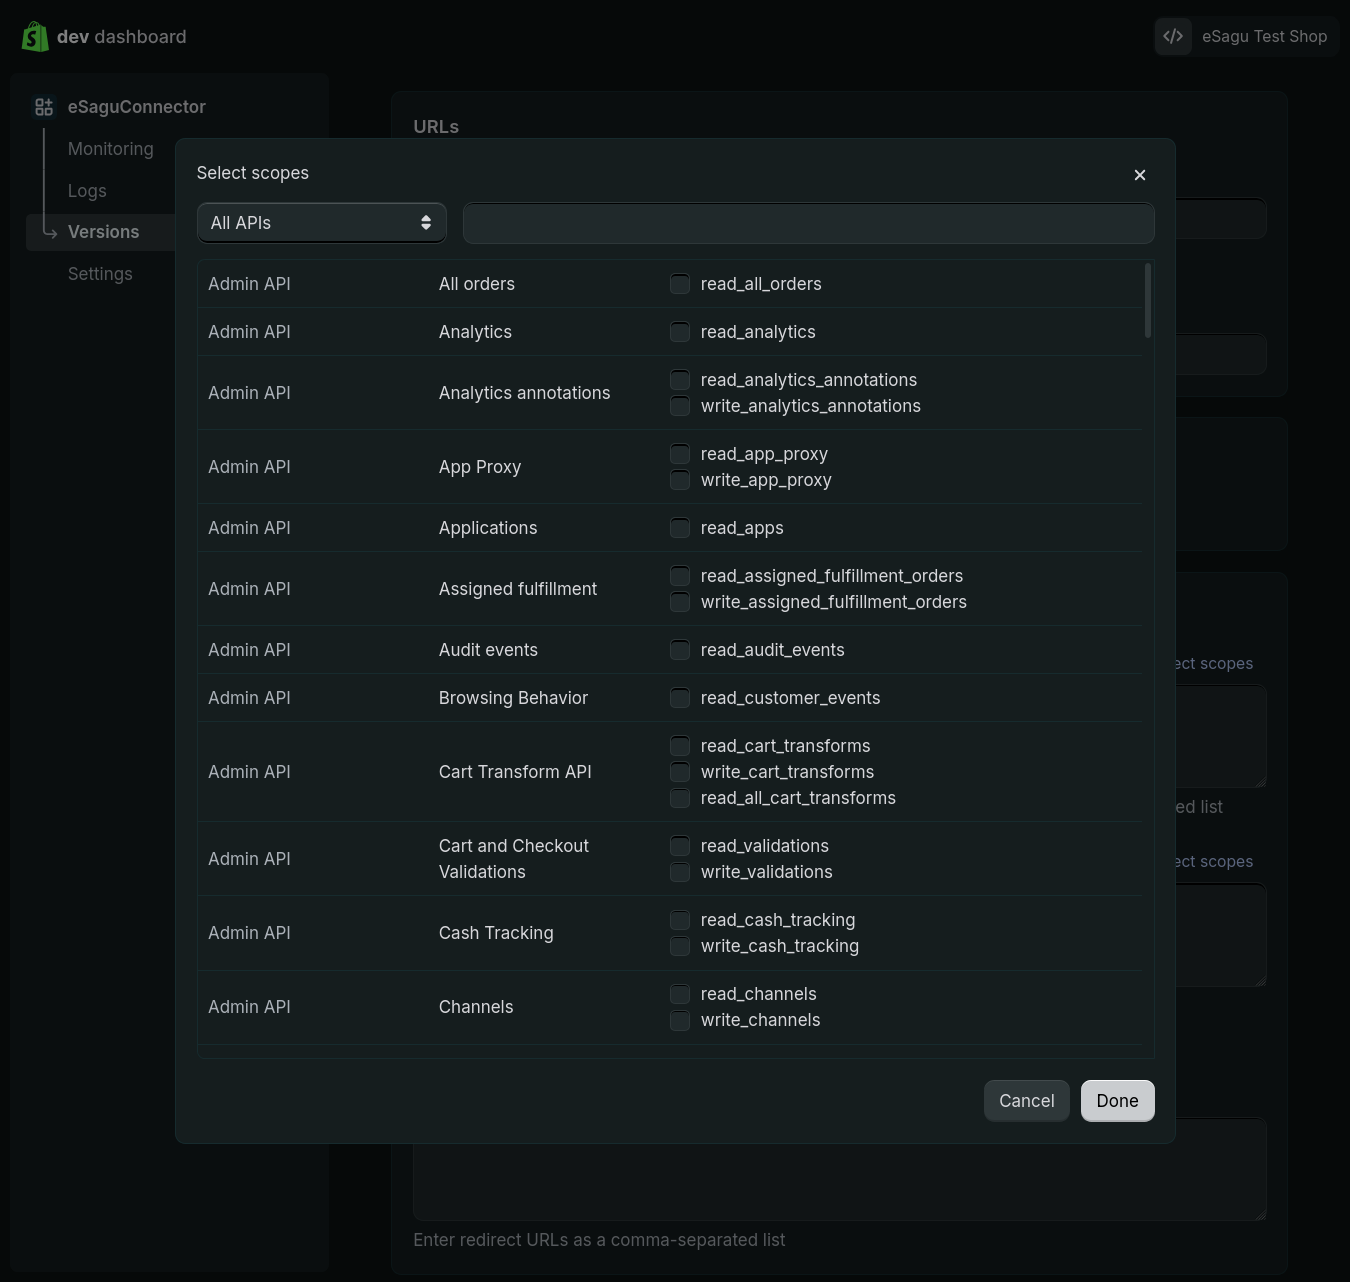
Confirm each selection by clicking Done.
-
Enter the following Redirect URL:
https://oauth.n8n.cloud/oauth2/callbackIf you use a self-hosted n8n instance, use the redirect URL provided by your instance instead. Then click Release.
3. Store the Shopify credentials in n8n
-
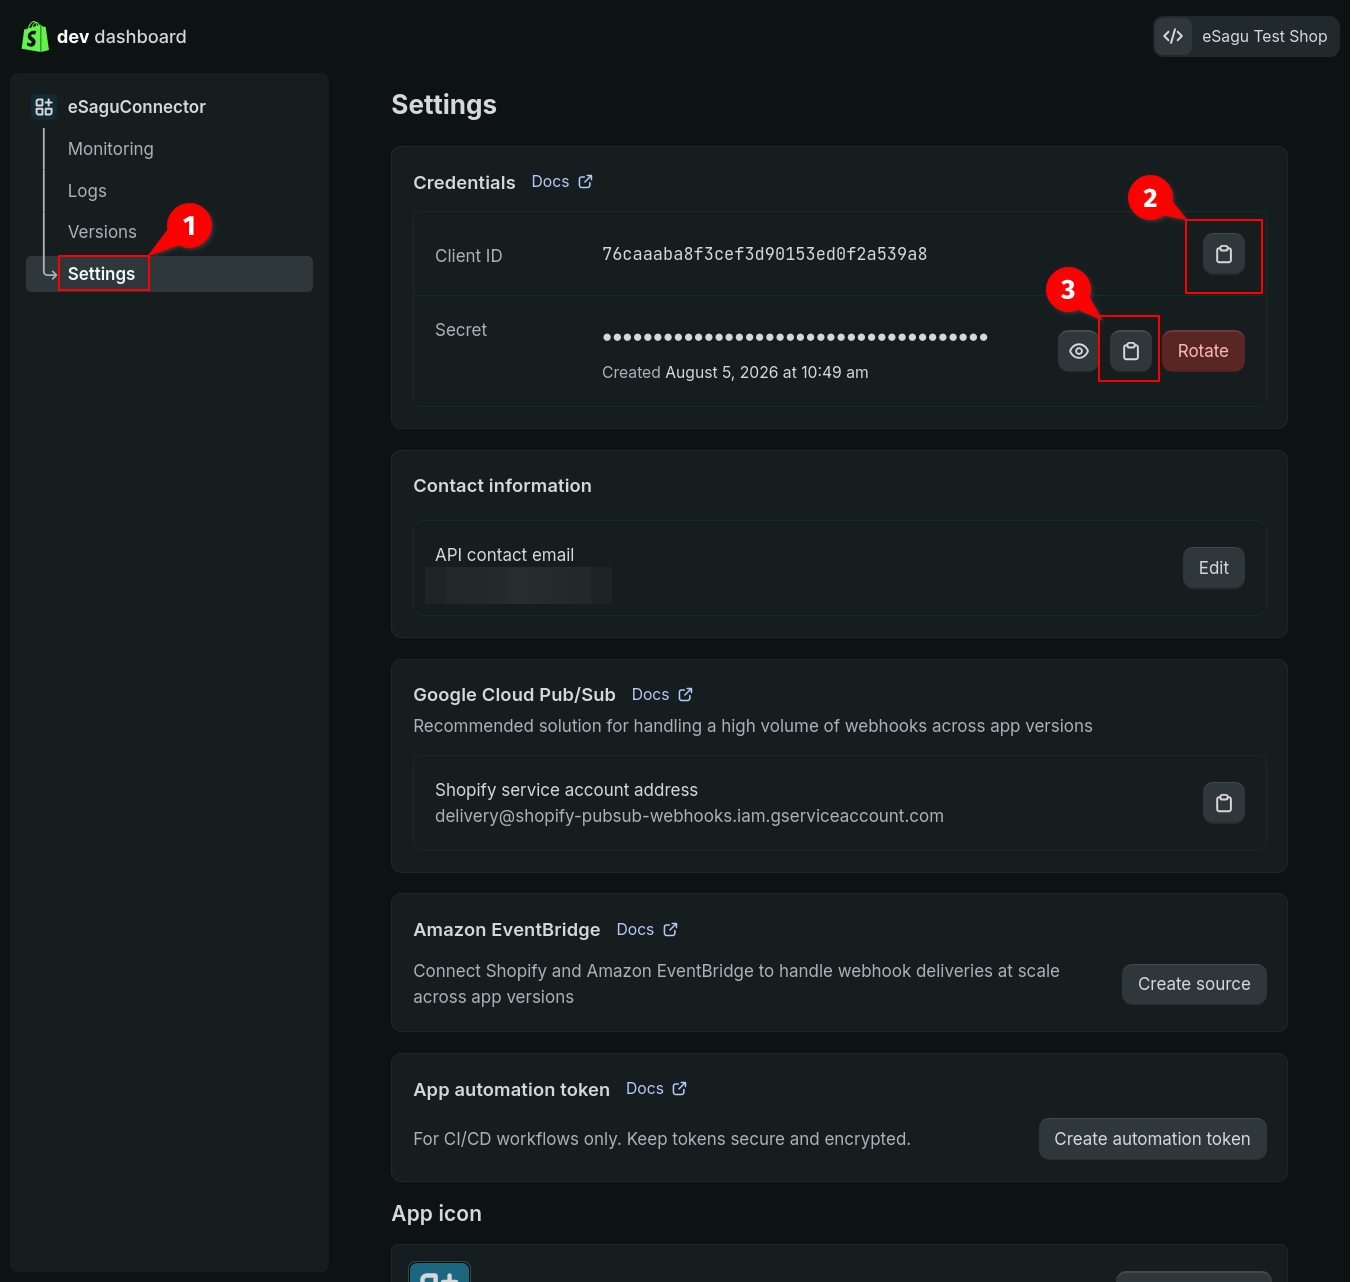
In the Shopify app's Settings, copy the Client ID and Secret.
-
In n8n, open Credentials and select Create credential.

-
Select Shopify OAuth2 API and continue.

-
Enter the Client ID, Client Secret, and shop subdomain. The subdomain is the part before
.myshopify.com.
4. Create an eSagu API token
-
In eSagu, open My account in the bottom-left corner and click Add under API tokens.

-
Enter a name for the token, select the appropriate eSagu account, and save it.
-
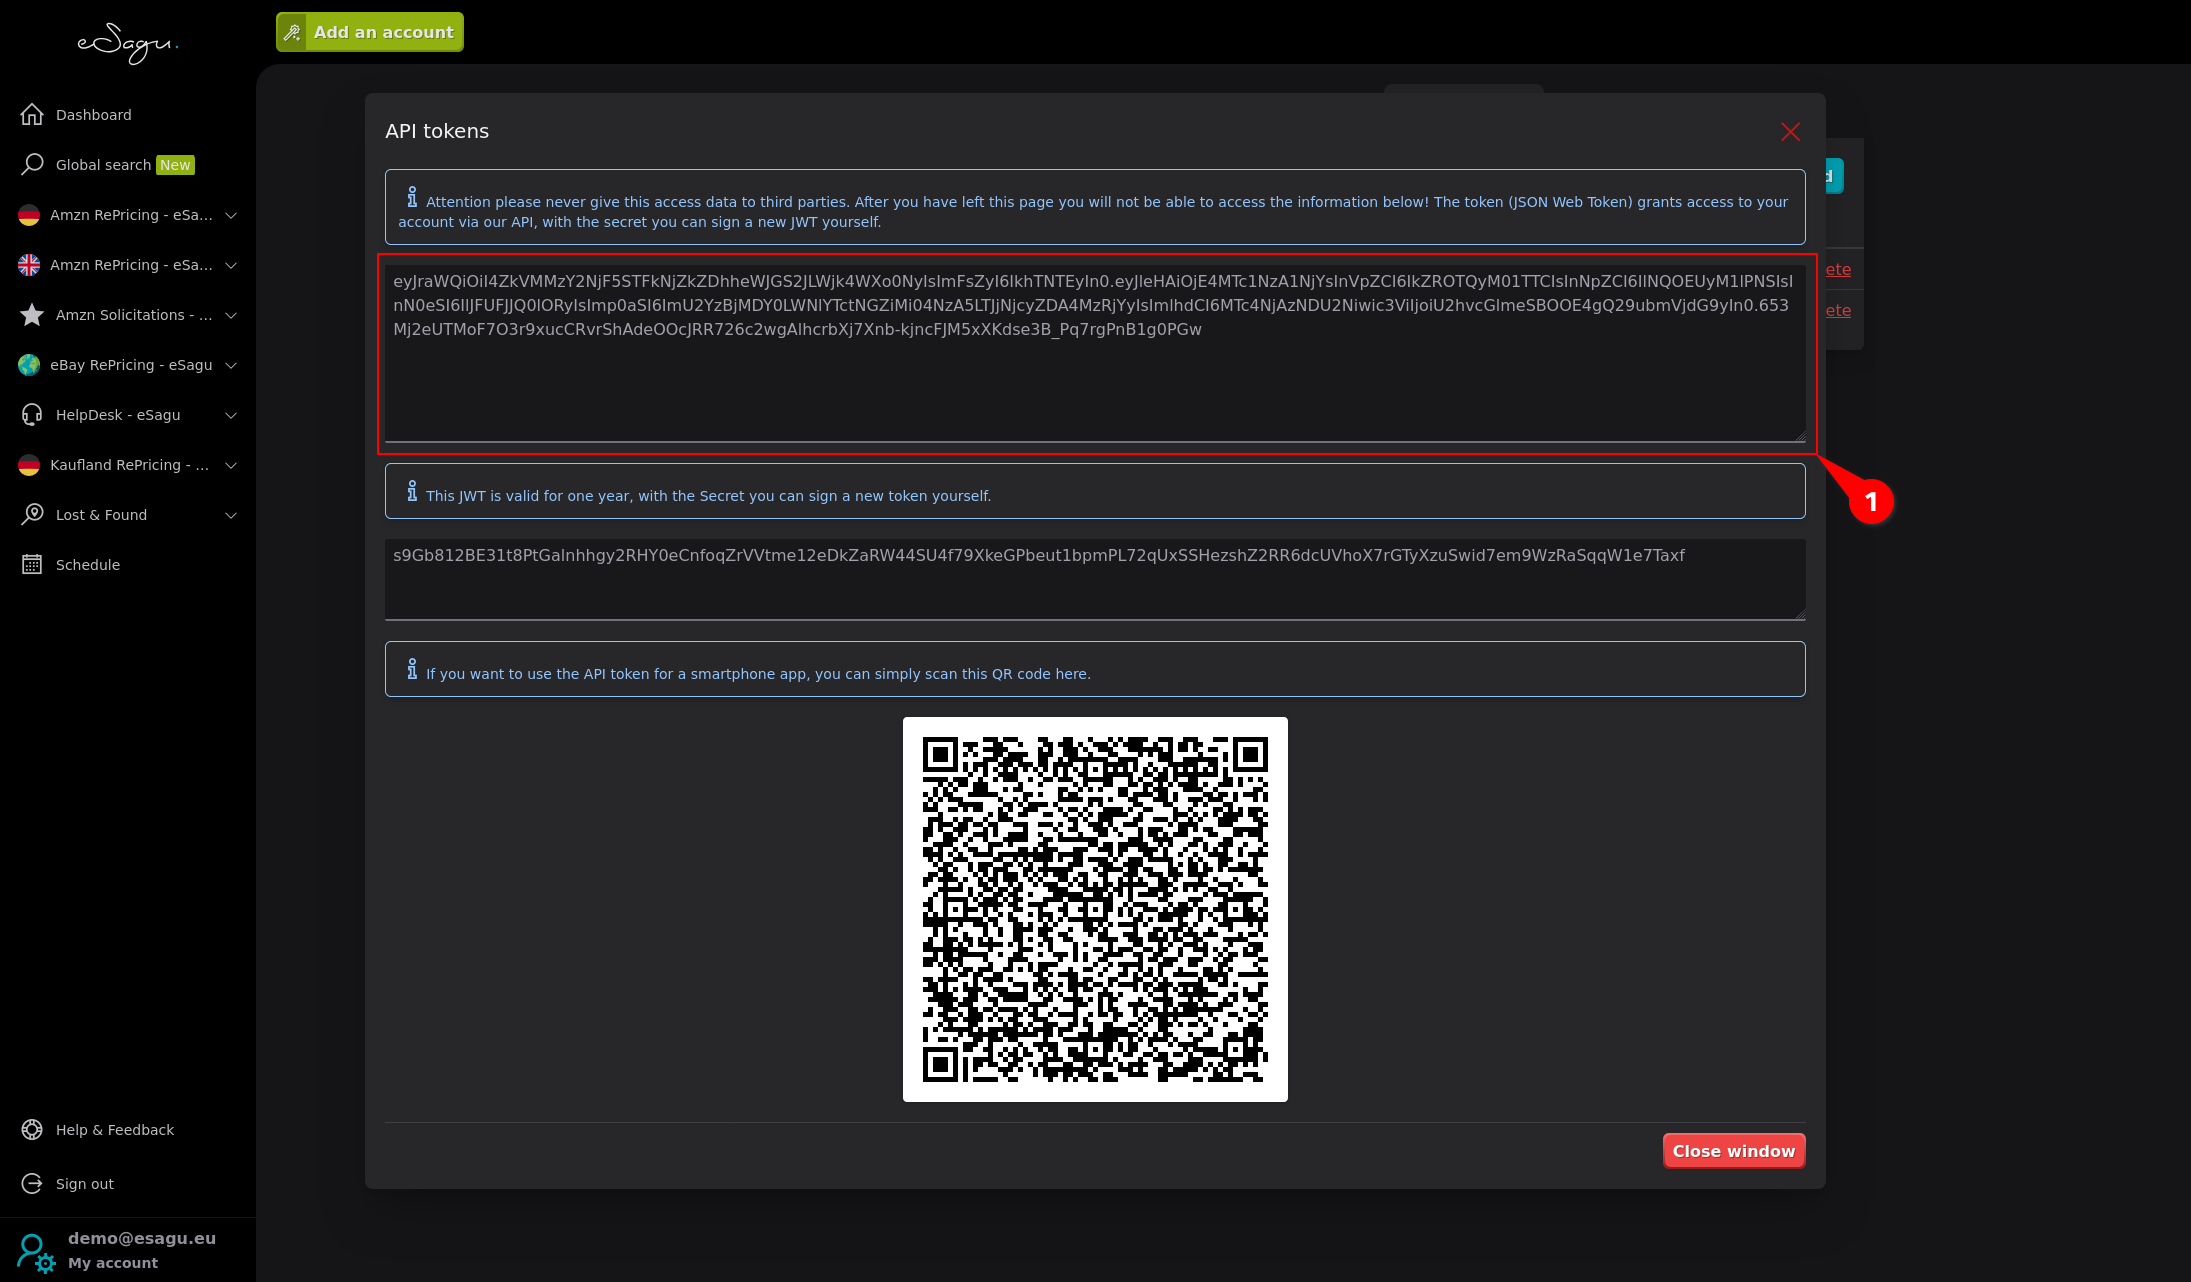
Copy the token immediately and store it securely. The complete token is displayed only once.
5. Store the eSagu credentials in n8n
-
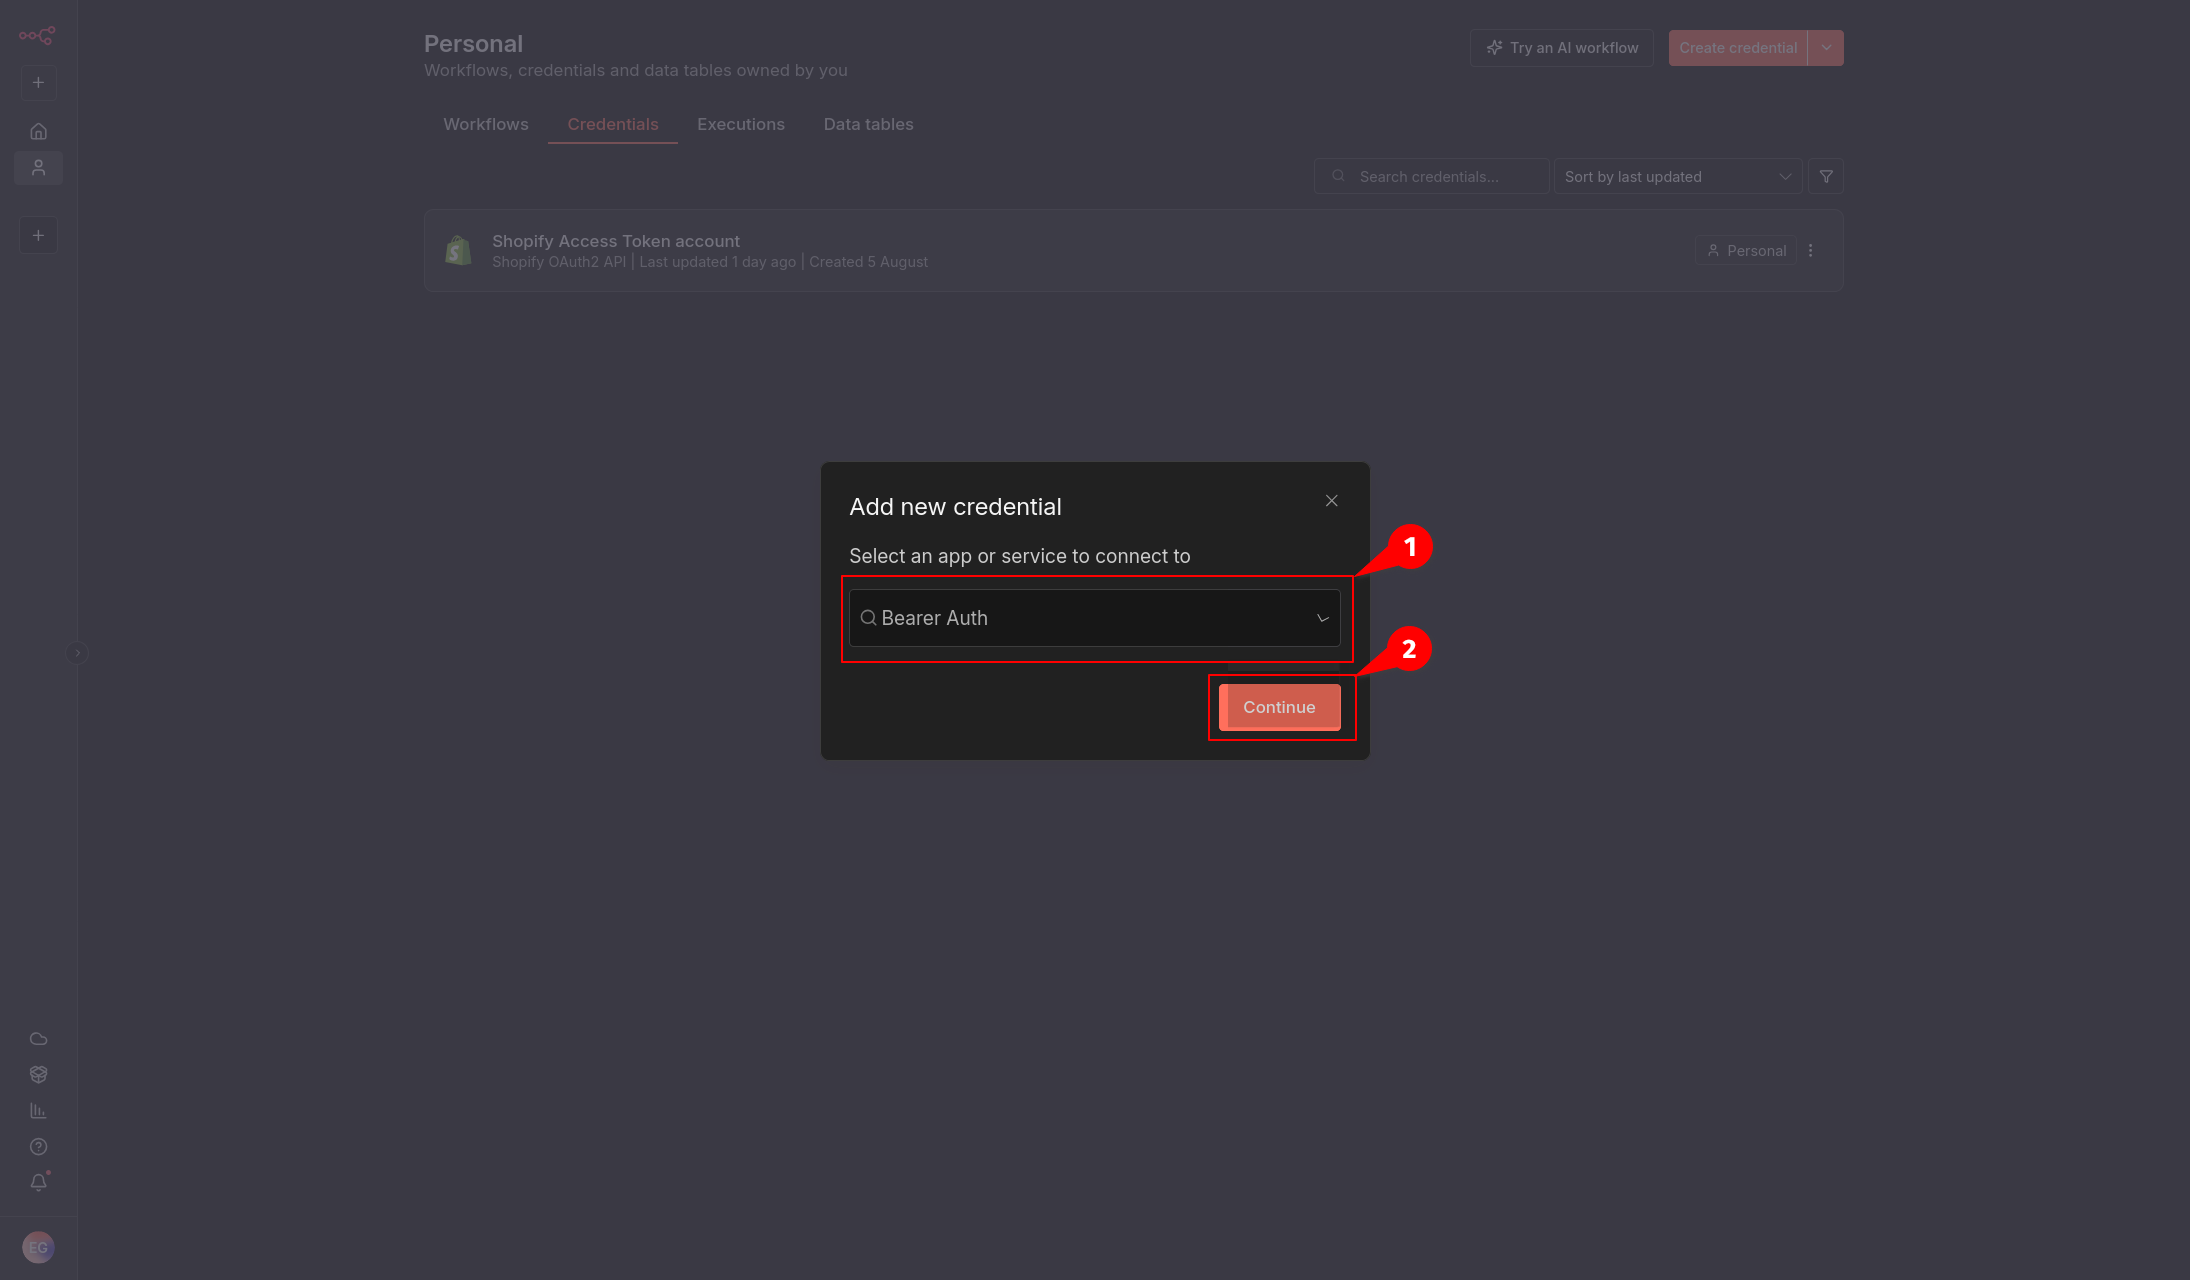
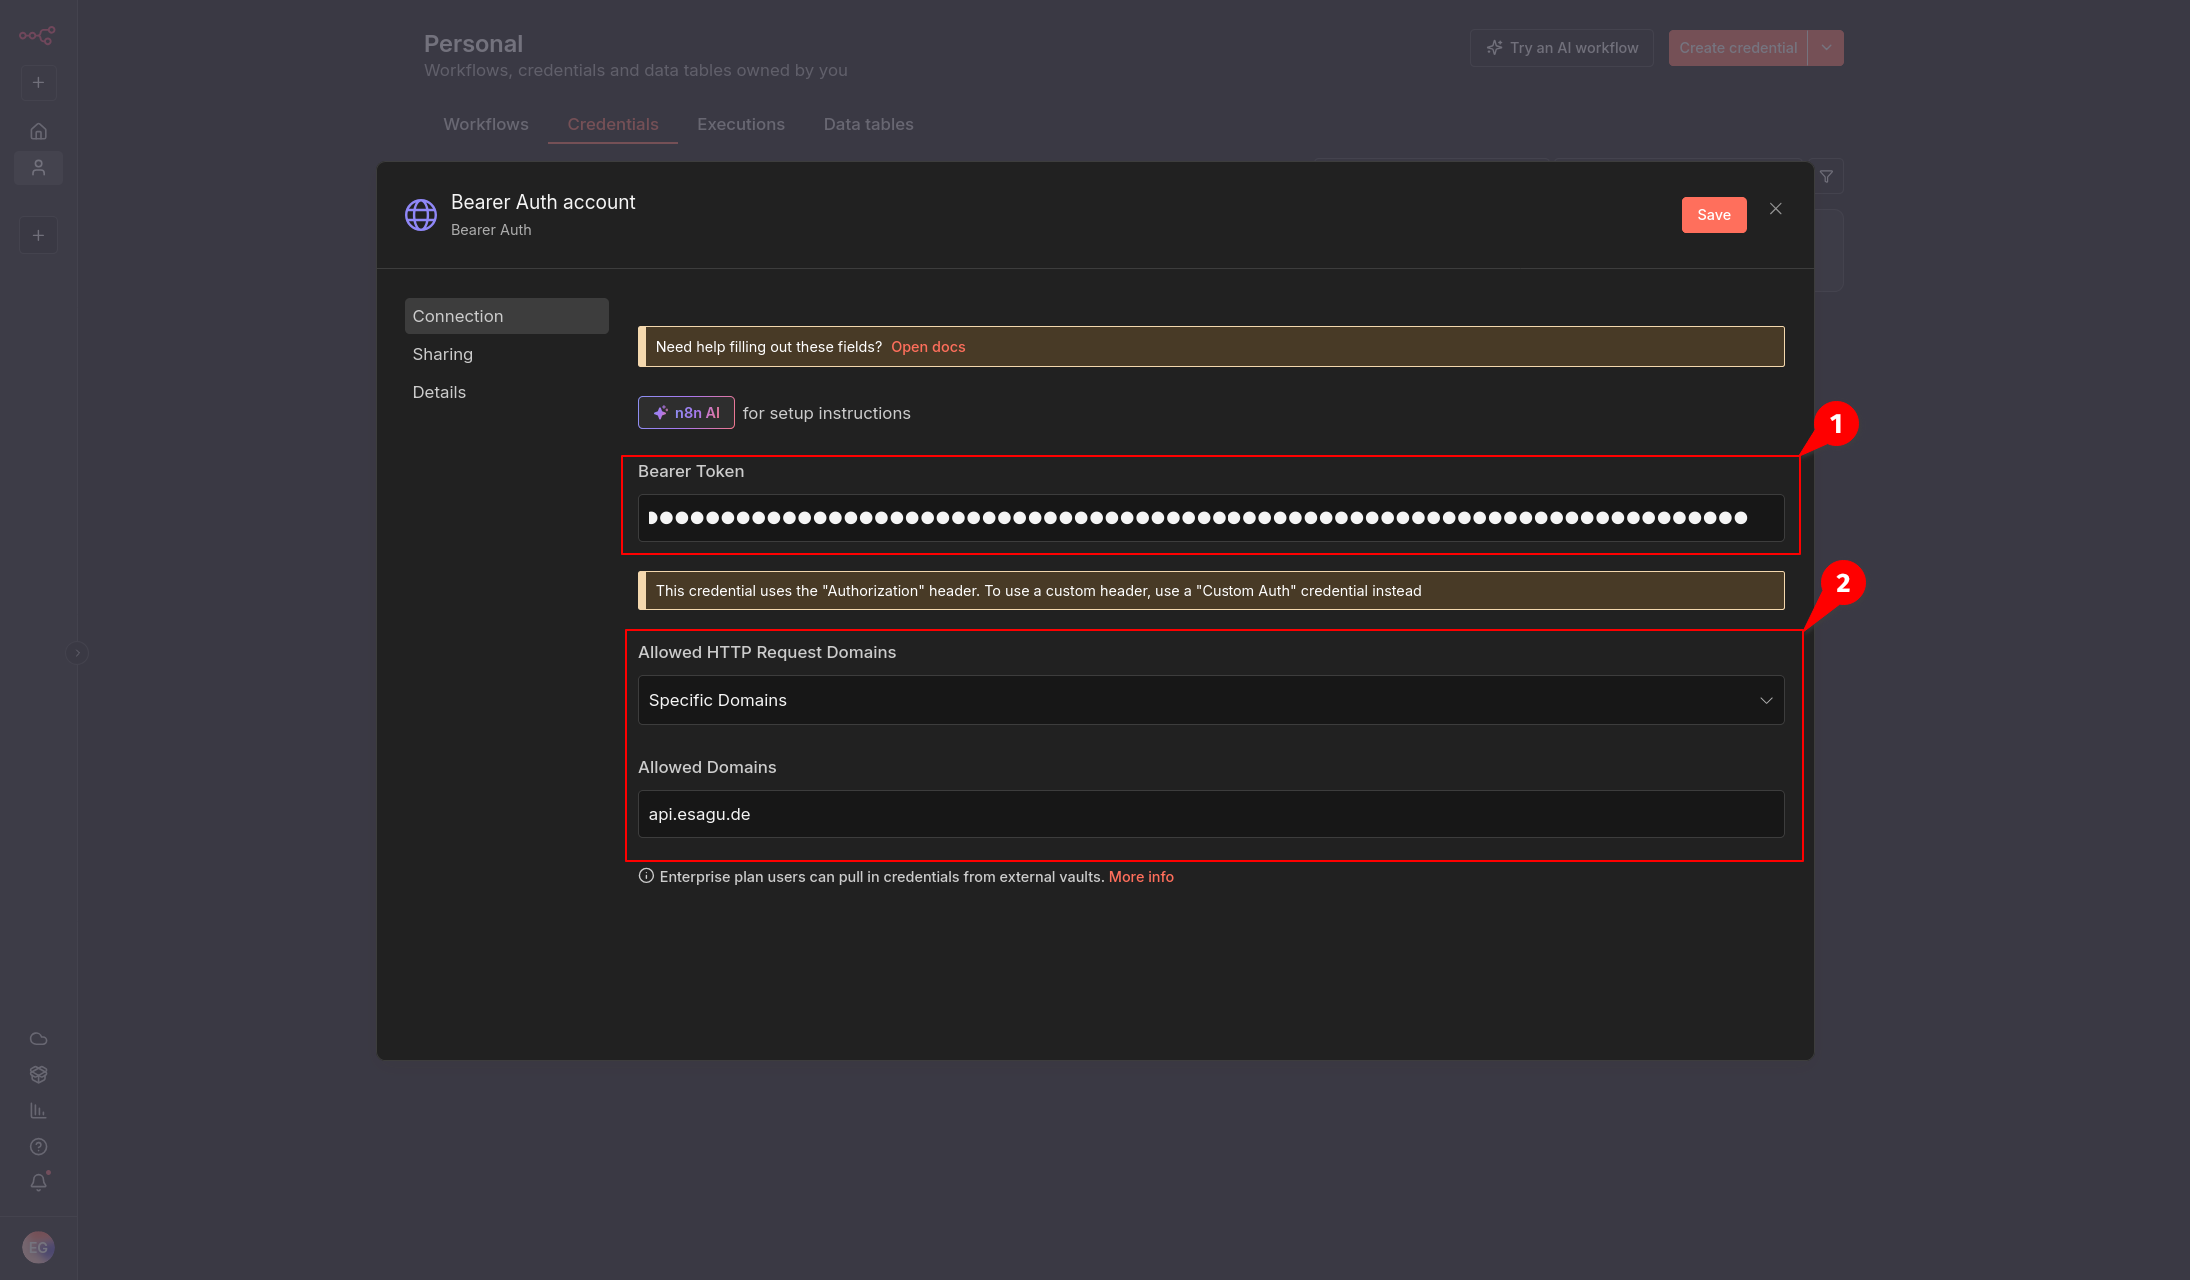
In n8n, select Credentials → Create credential, then choose Bearer Auth.
-
Paste the eSagu token into Bearer Token.
-
Under Allowed HTTP Request Domains, select
Specific Domainsand enter:api.esagu.de -
Save.
The connection is now set up. Continue with Part 2 to create the n8n workflow and synchronize your Shopify prices with eSagu.