eSagu MCP setup – Step-by-step guides for ChatGPT, Mistral, Open WebUI …
This guide describes how to integrate the eSagu Remote MCP Server into multiple AI platforms such as ChatGPT, Claude, Mistral, Open WebUI (and similarly Claude) using a unified OAuth-based setup. The goal is to make eSagu services available directly from the chat across platforms, without separate API keys or platform-specific configurations.
The Model Context Protocol (MCP) acts as a standardized interface that allows AI models to securely and structurally access external services. Through MCP, the AI can call well-defined eSagu functions and work with them in a context-aware manner. Authentication is handled via OAuth, ensuring access is user-specific and restricted to the authorized services.
The eSagu Remote MCP Server supports multiple eSagu services, including RePricing for Amazon, RePricing for eBay, RePricing for Kaufland, Lost & Found for Amazon FBA, and the eSagu HelpDesk. Depending on which service is authorized during the OAuth process, different context-dependent tools become available to the AI. This ensures that the AI only has access to the functions and data relevant to the selected service.
Once connected, the eSagu MCP Server can be activated within the respective platform and used directly in chat to, for example, list items, retrieve repricing information, handle Lost & Found cases, or create and manage support requests via the HelpDesk.
ChatGPT
- Click the profile area in the bottom-left and open Settings.

- Select Apps in the left sidebar.

-
Open Advanced settings at the bottom.
-
Enable Developer mode (Beta) (note: memory is disabled in this mode).

-
Go back to Apps and click Create app in the top-right.
-
In the New App dialog, enter:
- Name: e.g. eSagu
- MCP Server URL:
https://api.esagu.de/mcp - Authentication: OAuth
Optional: set icon/description. Confirm the warning and click Create.
Here your can download our App-Icon

- In the OAuth window, open Select Service, choose the service, enter your password, and click Authorize access.

- In the app details, verify that “… is now connected” appears and the URL is correct.

- In a chat, click + → More → eSagu to activate the app.

- Send a request (e.g., “List my items.”).

Claude
- Open the profile menu in the bottom-left corner and select Settings.
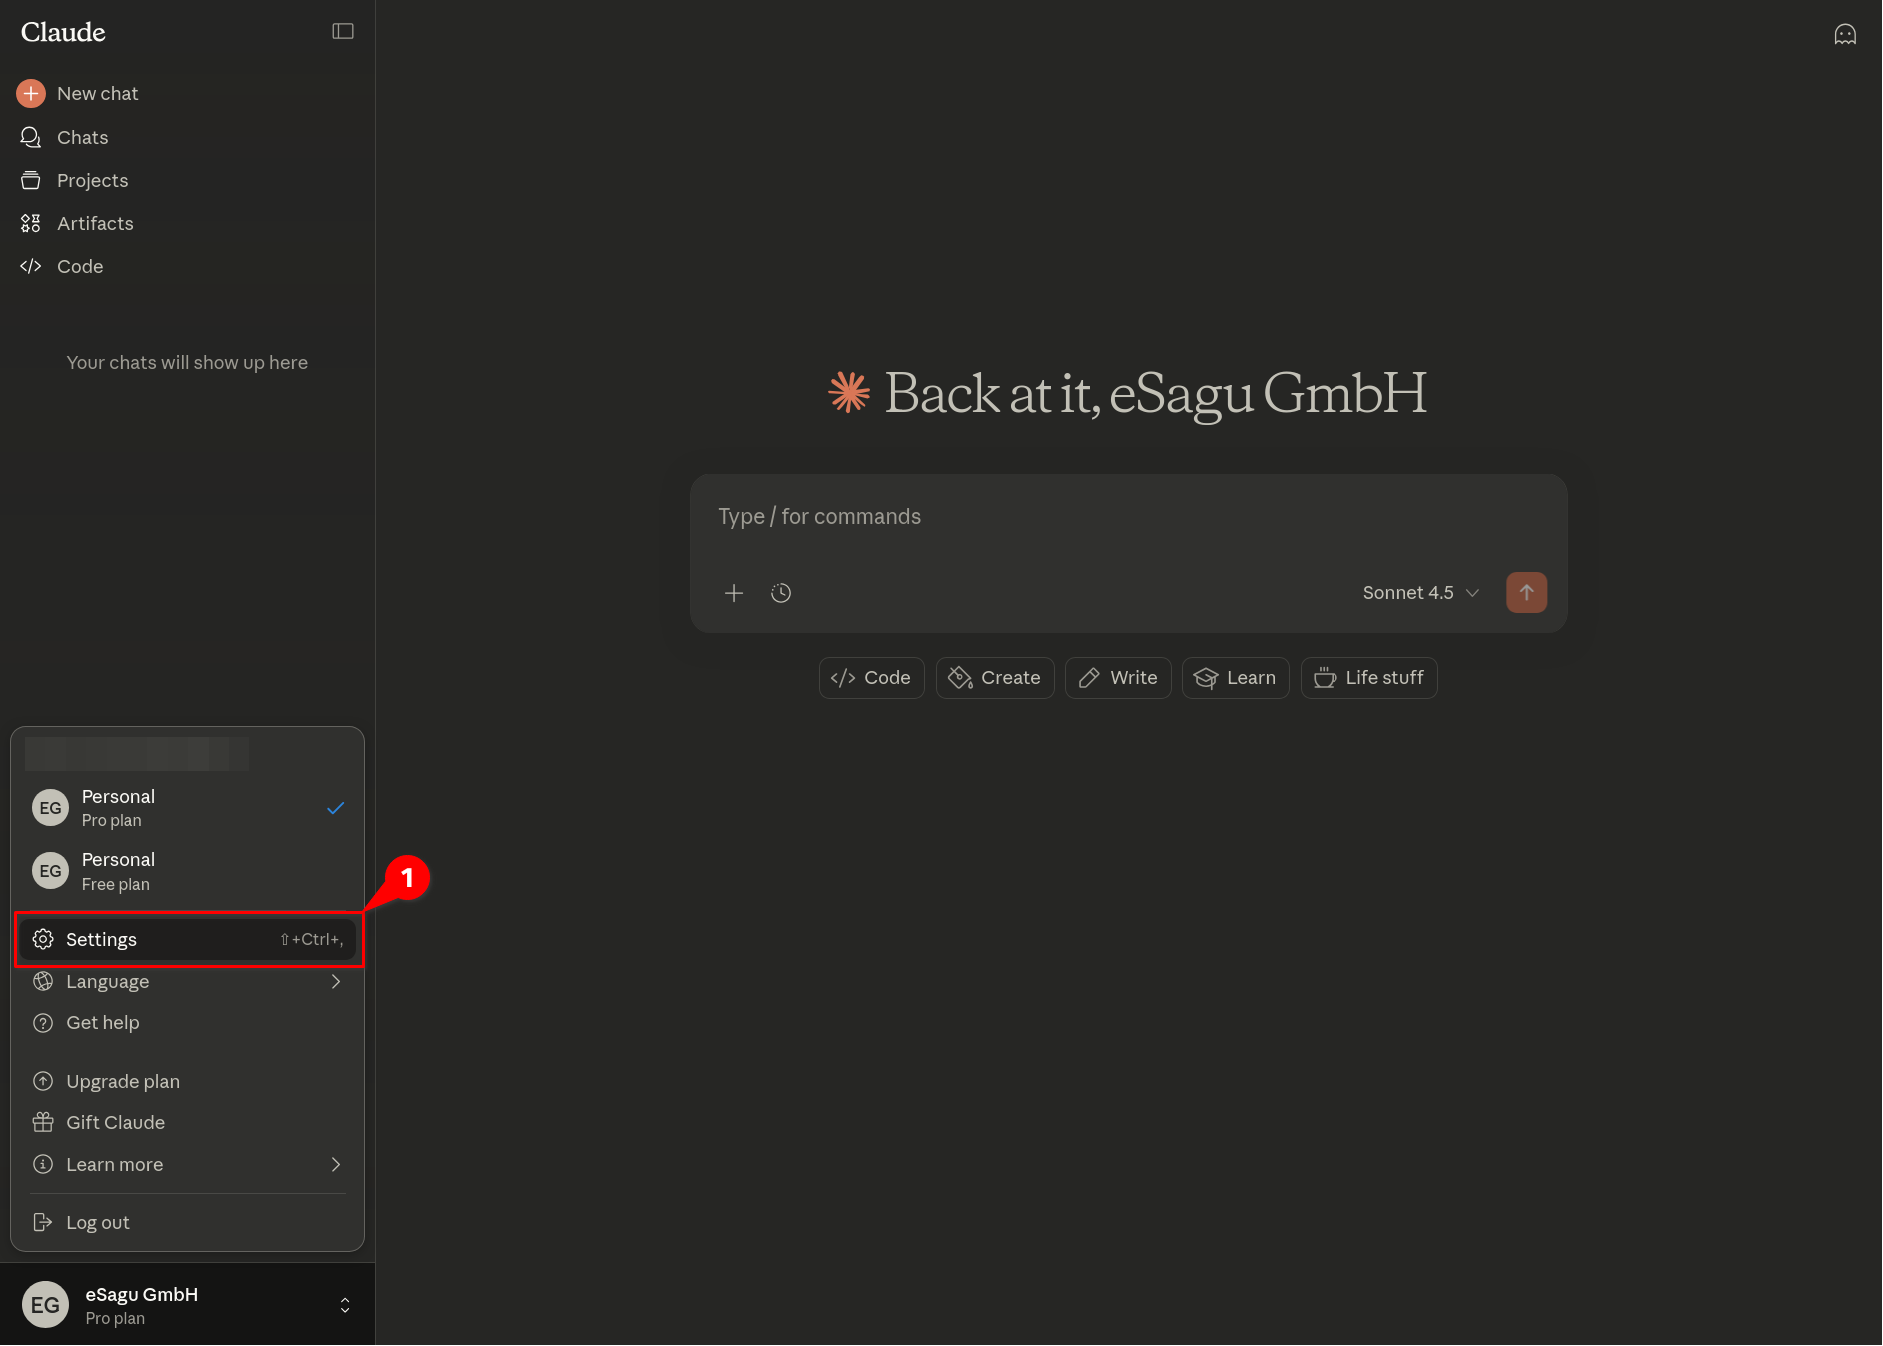
- Navigate to Connectors in the left sidebar.

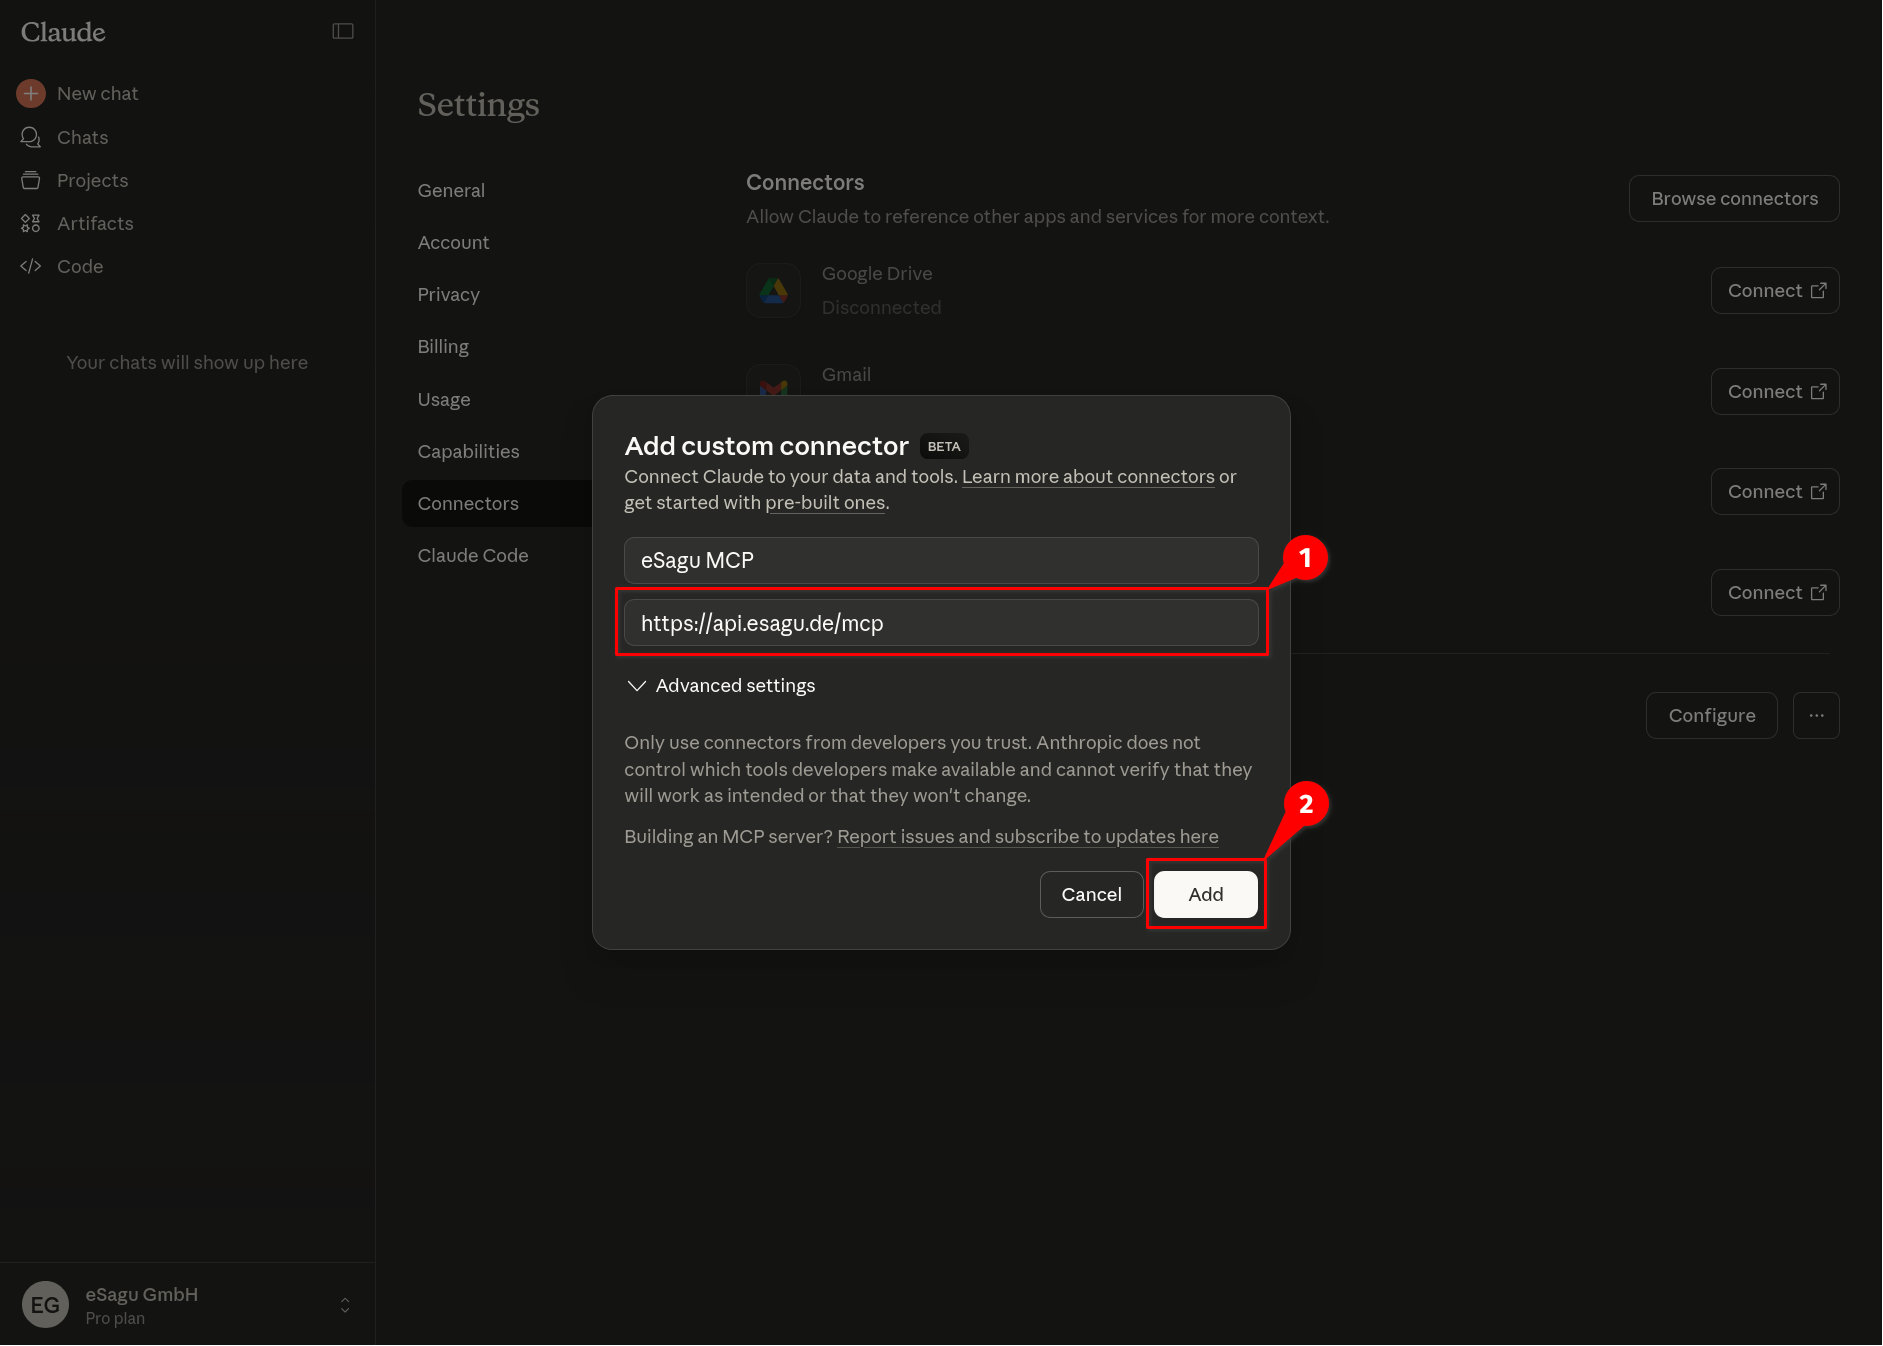
- Click Add custom connector.
-
Enter the following details:
- Name: eSagu MCP
- Connector URL:
https://api.esagu.de/mcp
Confirm with Add.

-
In the OAuth authorization screen:
- Open Select Service
- Choose the desired eSagu service
- Enter your password
- Click Authorize access
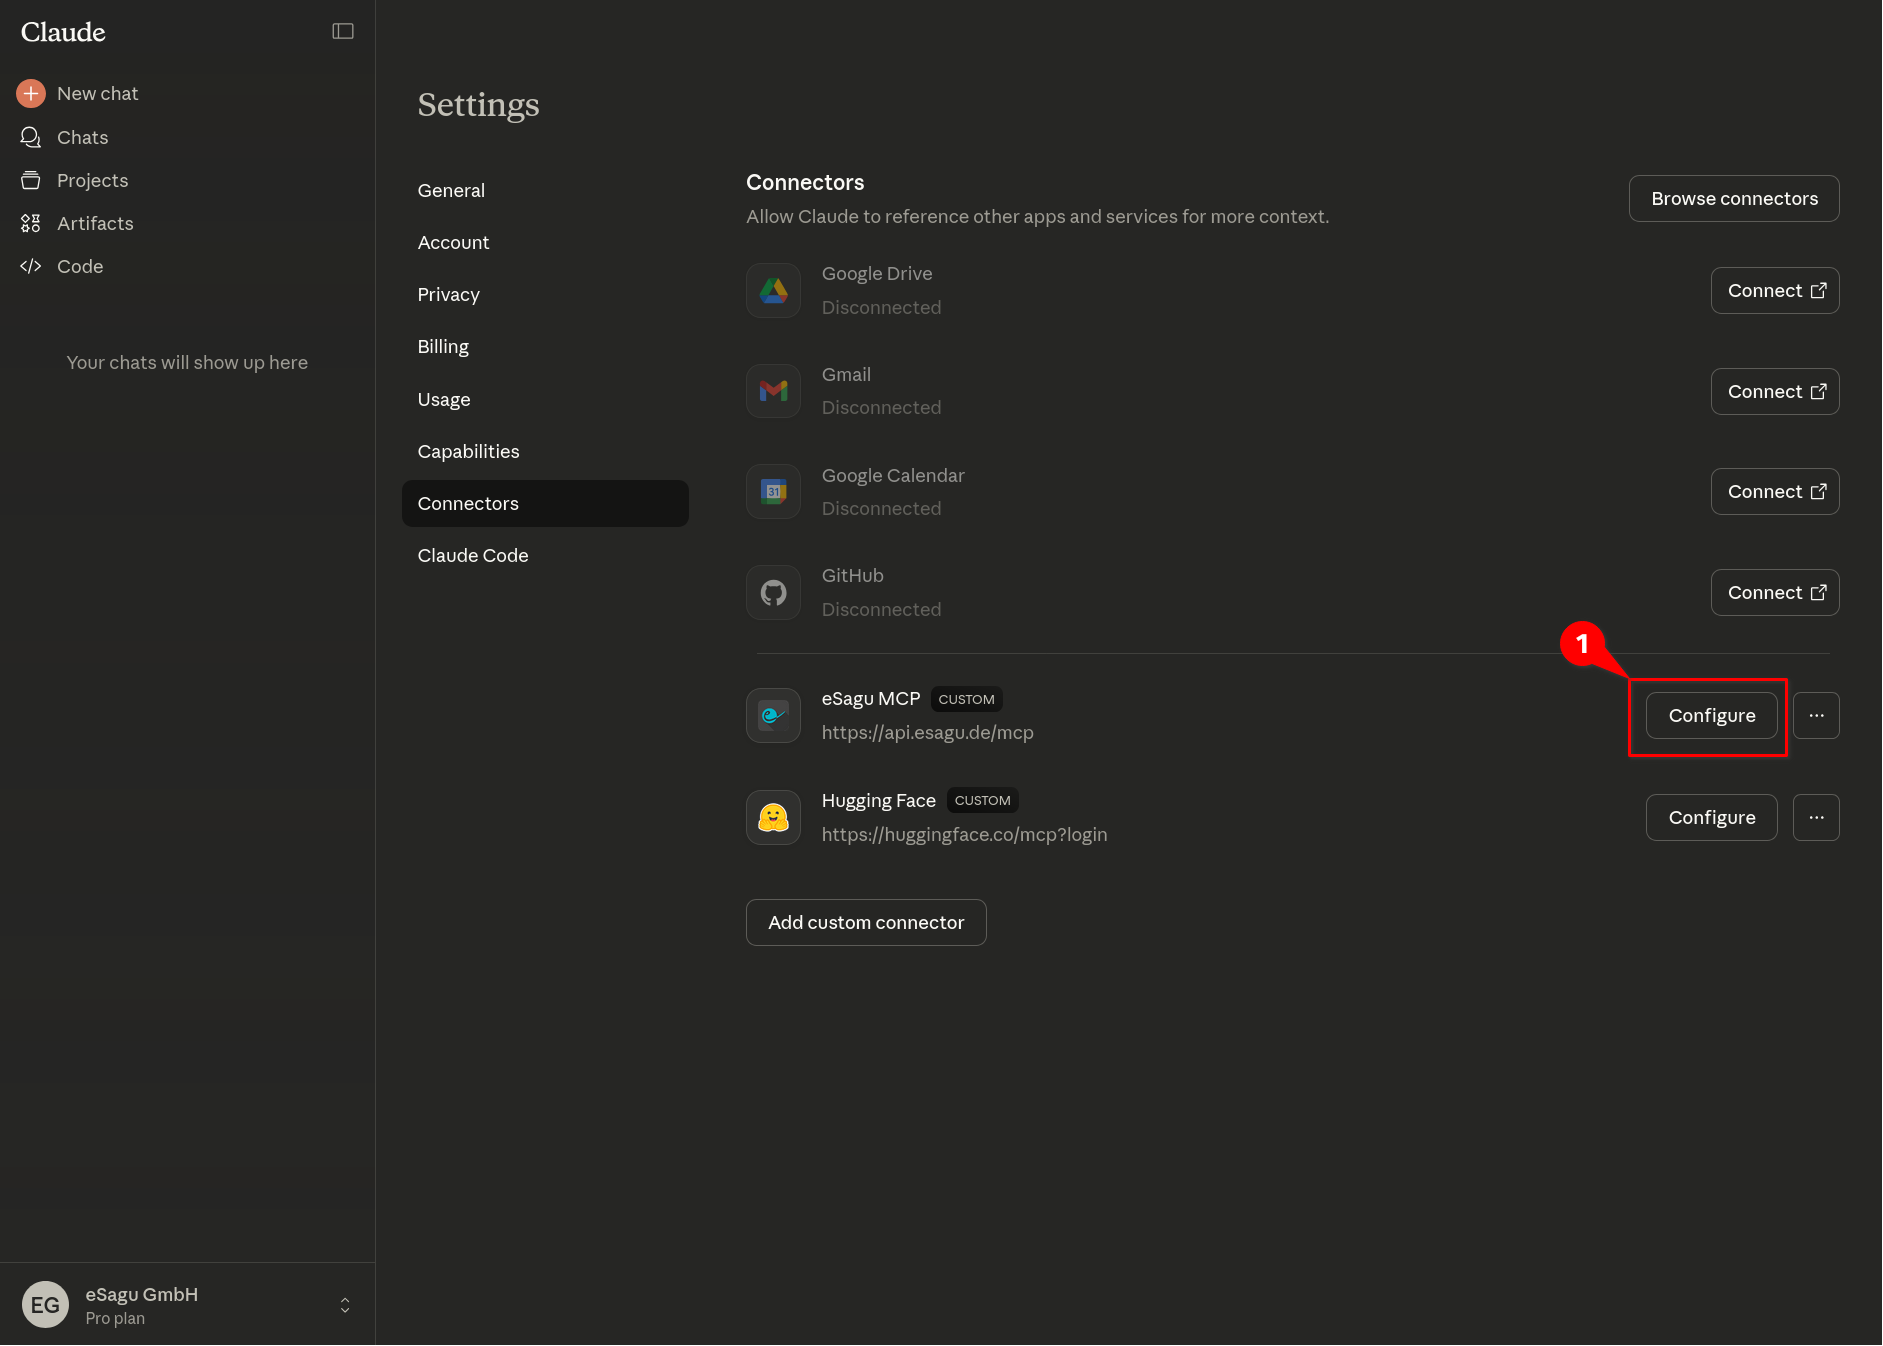
- After successful authorization, the connector appears in the list. Click Configure.
-
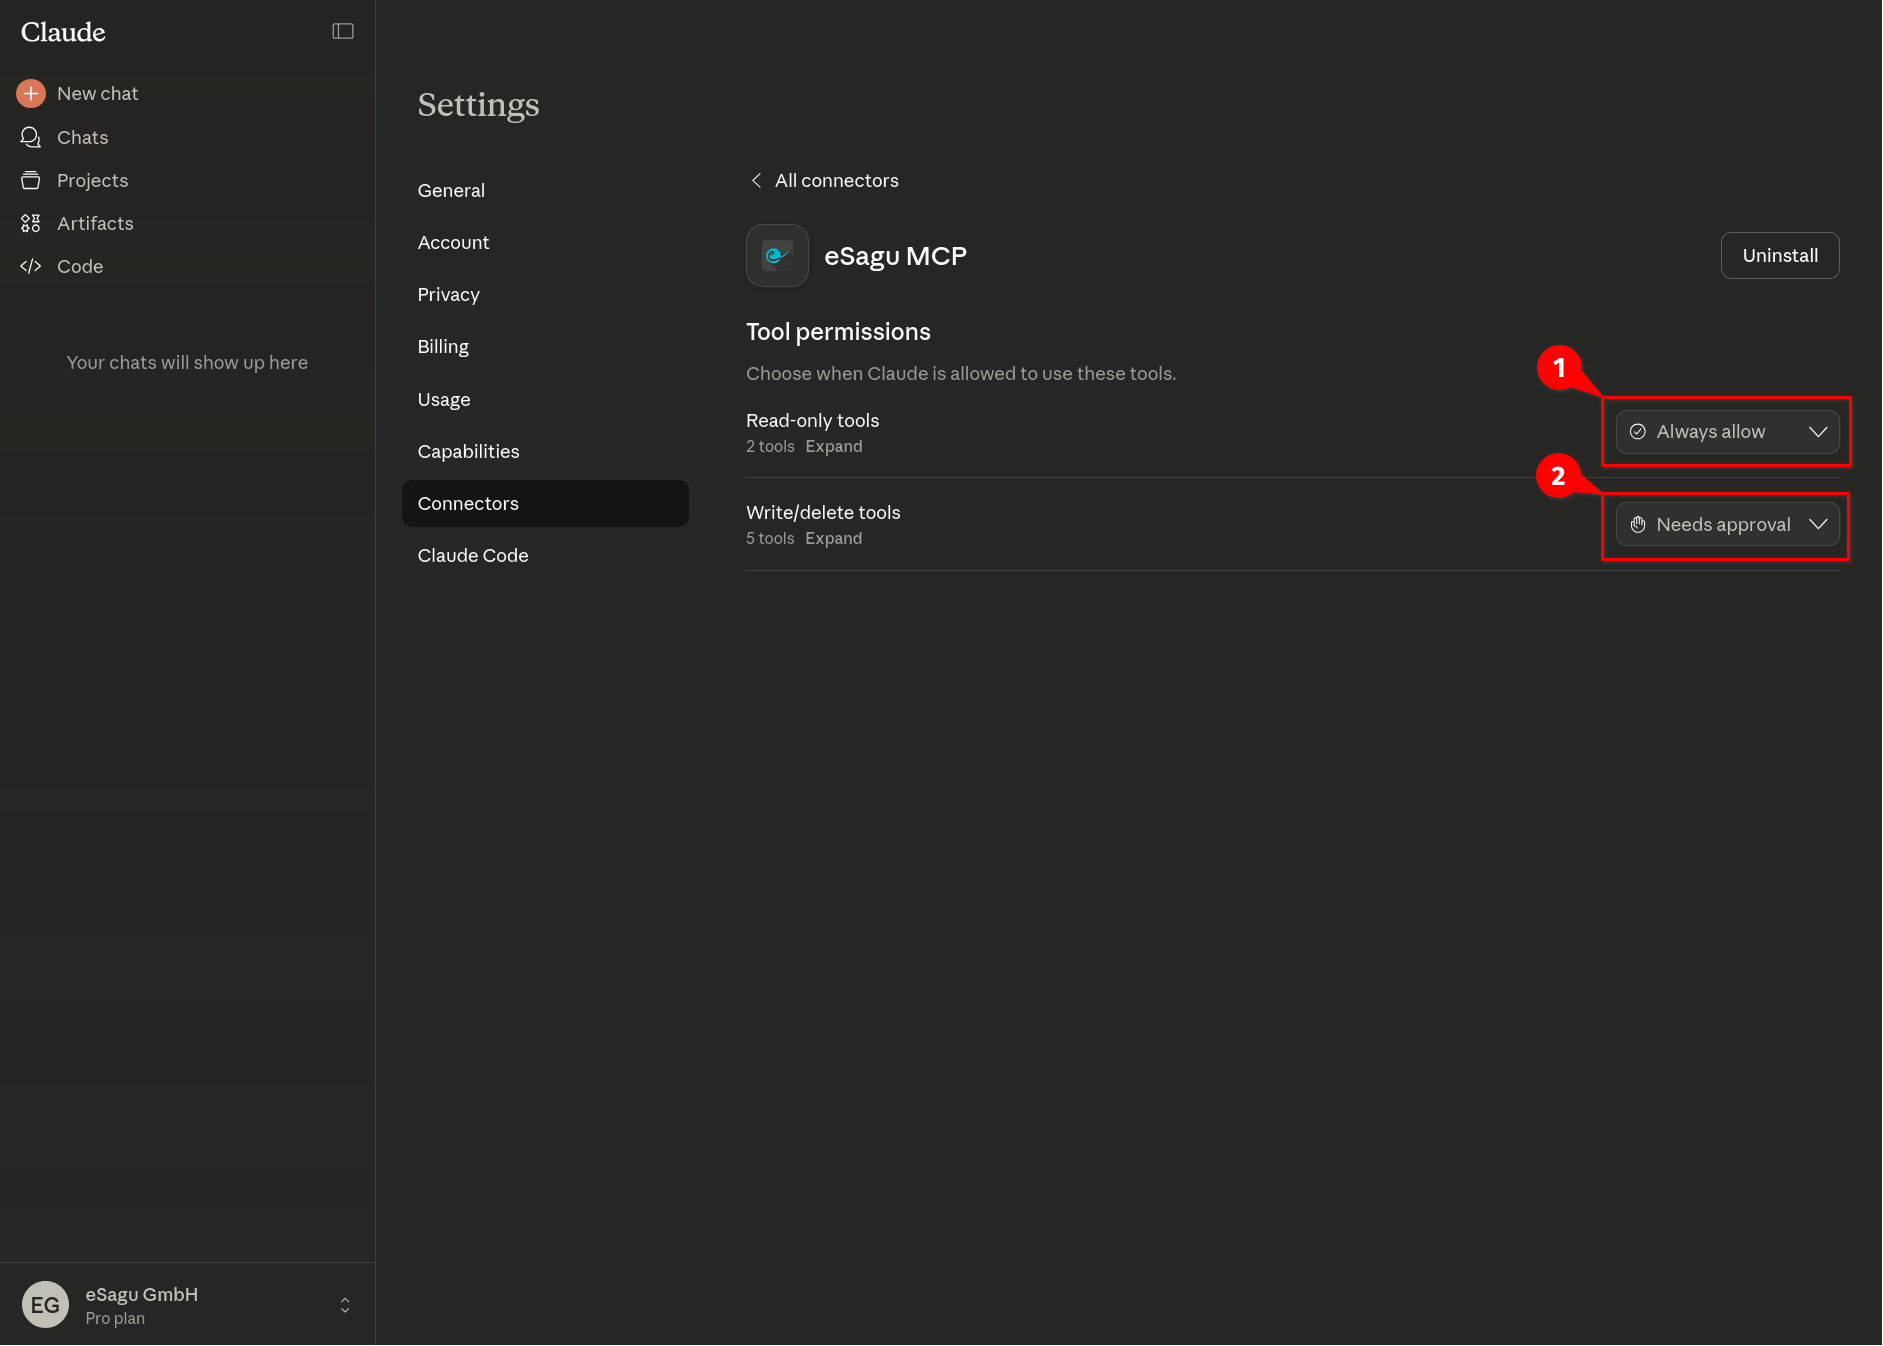
Set tool permissions:
- Read-only tools → Always allow
- Write/delete tools → Needs approval
The following setup is recommended because it provides a balanced trade-off between usability and control:
Read-only tools → Always allow Read-only actions (e.g. listing data, fetching information, status checks) can run without confirmation. This enables smooth, fast chat interactions and is safe since no changes are made.
Write/delete tools → Needs approval Actions that modify or delete data require explicit user approval. This ensures full control over critical operations.
This configuration is not mandatory. Depending on your use case, security requirements, or personal preference, permissions can be adjusted, for example:
- setting everything to Needs approval for maximum control
- or using Always allow for highly automated workflows in trusted environments
- The connector is now active. In any new chat, Claude can automatically use eSagu tools when appropriate.
Mistral
- Click Intelligence (Beta) in the left navigation.

-
Select Connectors.
-
Click Add Connector in the top-right corner.

- In the dialog, select Custom MCP Connector.

-
Fill in the following fields:
- Name: eSagu
- Connector Server:
https://api.esagu.de/mcp - Description (optional): eSagu Repricing & more …
- Authentication Method: OAuth2.1
-
In the OAuth window, open Select Service, choose the service, enter your password, and click Authorize access.

- Confirm with Create. The connector will now appear as Connected.

- Enable tools that you are planning to use.

- Open a new chat or use an existing chat to activate the connector.

- Type / in the input field and select eSagu.

- Send a request (e.g. “List my items on second page.”).

The following setup is recommended because it provides a balanced trade-off between usability and control:
Read-only tools → Always allow Read-only actions (e.g. listing data, fetching information, status checks) can run without confirmation. This enables smooth, fast chat interactions and is safe since no changes are made.
Write/delete tools → Needs approval Actions that modify or delete data require explicit user approval. This ensures full control over critical operations.
This configuration is not mandatory. Depending on your use case, security requirements, or personal preference, permissions can be adjusted, for example:
- setting everything to Needs approval for maximum control
- or using Always allow for highly automated workflows in trusted environments
Open WebUI
- Open Admin Panel from the bottom-left menu.

- Go to Settings → External Tools.

- Click + (top-right) to add a new connection.
- Configure the connection:
- Type: MCP Streamable HTTP
- URL:
https://api.esagu.de/mcp - Auth: OAuth 2.1

-
Click Register Client. The OAuth authorization window opens.
-
In Select Service, choose the service, enter your password, click Authorize access.

-
Verify the status changes to Registered.
-
Click Save.
-
Open a new or existing chat, enable tools via the tool icon next to the input field, Select eSagu.

- Send a request, e.g. (List all items with "Einstein" in the name)
Disclaimer MCP is currently in beta across all supported platforms. The Model Context Protocol itself is still relatively new (introduced in November 2024) and is under continuous development and extension. As a result, platform user interfaces may change at any time, and the MCP protocol is subject to ongoing updates and enhancements.